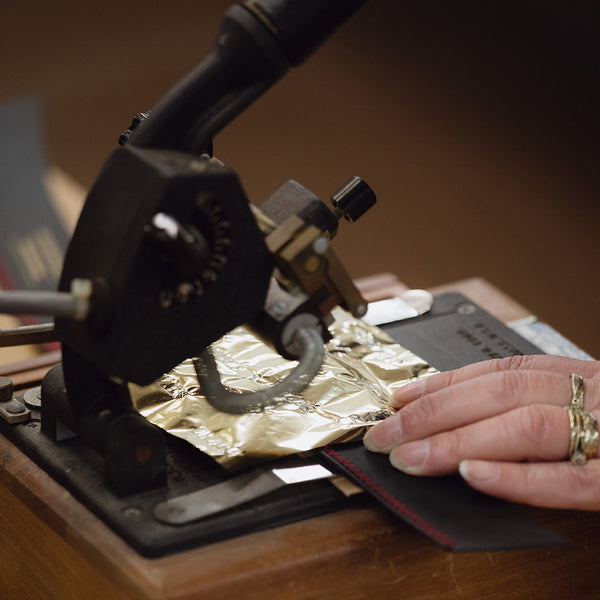
Behind every well-shaped cap are a handful of modest tools that quietly determine its profile. Hatmakers may first notice fabric and fit, yet it is the block, the steam, and the finishing irons that sculpt the form, each stage a detail that rewards closer inspection.
In this post we explain how to select the block that defines a hat's profile, match materials to their appropriate tools, and employ steam, heat, and timing to coax form. We also outline practical techniques for turning and binding the brim, and for using trim tools to produce a crisp silhouette that can be reproduced reliably.

How to choose the hat block that defines its silhouette
Begin by matching the block geometry to the wearer: crown height, taper, and brim radius set both the internal volume and the external silhouette. Measure head circumference, forehead-to-back depth, and crown height before selecting a block. A taller crown increases internal volume and lifts the silhouette, while a shallower crown creates a closer, more streamlined profile; taper and brim radius alter how the panels fall and how the cap reads in profile. Choose block material and finish to suit your technique: hardwood or sealed blocks absorb moisture and hold fine surface detail for pounding and steaming, metal or composite forms conduct heat for thermoforming, and a calico or canvas barrier will protect the block while helping the fibres take the intended shape.
Build a core library of blocks: low, mid, and high crowns, and two or three brim radii. Label each block with notes on material compatibility and observed behaviour so selection is reliable. Create a traced mould or a three-dimensional scan of a well-fitting cap to reproduce the preferred profile, and record which block and which sequence produced the best result. Document a concise blocking routine: mark the centreline, tack panels from the centre outward, apply steam or controlled heat to relax the fibres, seat and stretch the material into the block, and fix brim tension with pins or clamps. Test the result on a headform, note any misalignments, then refine either the block profile or your technique to prevent panel distortion and uneven brim fall.
Fit soft foam inserts for a closer, secure fit.

How to match hat materials with the tools best suited to their care
Different cap materials require particular tools and techniques. Wool and fur felt are eased over a wooden hat block and shaped by hand with gentle steam to relax the fibres, smooth the nap, and set the profile. Braided and seagrass straw perform better on a damp-stretch frame, secured with fine pins and a light starch to fix the curves. Leather needs careful skiving of seam allowances, wet-moulding on a warmed wooden last, and attentive edge burnishing to control the roll. Canvas and cotton twill find their geometry through hair canvas or buckram interfacing, worked with a clapper and tailor's hammer. Each material responds differently to heat, tension, and internal structure, so the choice of tools determines how crown, brim, and fall will read in wear.
Given those material responses, small changes to the shaping tools will alter a hat's silhouette more than obvious edits to the outer cloth. A modest adjustment to the block radius, for example, will change how the hat frames the face and how the brim falls far more than a small change to crown height. Straw, in particular, retains the curves imparted by a low-profile last rather than by internal stiffeners, so choose the last with the finished line in mind. Trim bulk by skiving before moulding, and set seams with a clapper and hammer to produce crisp lines. Pre-shape millinery wire with pliers before encasing it so the brim geometry is locked in from the start. Use a petersham stretcher to seat the sweatband and a curved awl to maintain the band roll; the stretcher helps size and stabilise the band without distorting adjacent seams. Test combinations of wire gauge and band tension on samples to judge their effect on perceived fit. Finally, allow assemblies to rest until fibres, starch, or interfacing adhesion stabilise. That pause is not idle; it often finalises how the cap will behave in wear.
Use fur felt for a refined, precisely blocked competition silhouette.

How to block a hat: control steam, heat, and timing
Shaping begins as a simple sequence of considered actions. Relax the fibres with measured vapour, mould the warm cap on a wooden block, then let it dry on the form to set the profile. Test on a scrap each time to learn how long the material remains pliable under your workshop conditions. Use short, controlled bursts of vapour rather than a continuous flow, blot away any excess moisture, and watch the return of surface texture and sheen as a cue that the fibres are closing and the shape is taking. Concentrate heat where you want curvature, and shield adjacent panels with a damp cloth or pad to prevent unwanted shine or shrinkage. Apply steady, even pressure with a forming tool or your hands to create gradual contours rather than forcing abrupt changes.
Make small, repeatable adjustments: move to slightly larger or smaller hat blocks, pin progressively, and keep a photographic or written record so you can reproduce a successful profile. Tailor your method to the material. Look for darkening and softening in leather, restoration of the nap in felt, and the alignment of fibres in straw, then reduce or increase steam and adjust your shaping technique accordingly. Those material signals, combined with incremental blocking, provide practical feedback that helps you refine timing and heat for particular occasions, from garden parties to formal race days.
Practical shaping checklist and material cues
- Relax fibres and test: deliver short, controlled bursts of vapour to the targeted area, blot excess moisture, and practise on a scrap until you know how long the material stays pliable, concentrating heat where you want curvature and shielding adjacent panels with a damp cloth or pad to avoid unwanted shine or shrinkage.
- Block and shape: mould the warm cap or panel on a wooden block or form, apply steady, even pressure with a forming tool or your hands to create gradual contours, pin progressively with slightly different block sizes, and leave to dry on the form until surface texture and sheen indicate the profile is set.
- Read materials and adapt: for leather, watch for darkening and softening and reduce steam intensity; for felt, look for nap restoration and use firmer forming while it dries; for straw, observe fibre alignment and employ gentle focused heat; for synthetics, always test a scrap and use lower intensity to avoid surface damage.
- Record and iterate: keep photographs and brief notes of block size, steam intensity, contact time, pin pattern, and final profile, move in small increments between block sizes, and repeat the same sequence until you can reliably reproduce the shape for different occasions.

Turn, shape, and bind the brim by hand for a crisp edge
Begin by blocking and steam-set the brim over a wooden or synthetic block, pinning from the centre out so the fibres relax evenly. Allow the piece to cool on the block to fix the curve. Insert a shaped support, such as buckram or multi-ply canvas, between the outer fabric and the lining, and skive the seam allowances to reduce bulk at the edge. Baste close to the perimeter so the brim holds its profile without feeling heavy. Anchor a bias binder or a narrow folded tape with evenly spaced tacking stitches, then stitch close to the finished edge using a slightly longer stitch length for flexibility. Finally, clip and press the curves so the binding sits flat and follows the brim line. The result is a brim that has been shaped rather than assembled, its craftsmanship apparent in the neat binding, reduced bulk, and smooth curve.
Conclude the join with a fine blind catch stitch or a series of small whipstitches to conceal bulk and prevent puckering. Compress the edge with a bone folder, a cloth-covered paddle, or a seam roller so the brim reads as a crisp, tactile line. Cut swatches of the cloth, interlining, and stitch settings; observe how tension and stitch length alter the way the crown meets the brim, and record the combination that produces the cleanest edge for that material. Repeat these tests whenever you change fabric or support so decisions rest on measured results rather than guesswork.
Use discreet interior pads for a snug, balanced fit.

Hand-finish with trim tools to define the silhouette
Curved millinery needles, paired with fine, conditioned thread, will pass cleanly through multiple layers without distorting the crown. Take short, even stitches, and test stitch depth and tension on a scrap panel first. Tack trims into position before the final sewing to preserve the intended silhouette. After steaming a brim or crown, use a wooden clapper on blocking forms to press and lock a crisp line. Work in short, repeated steams and allow the timber to absorb moisture between each; this sets a cleaner edge than a single prolonged steam and helps the finished profile sit sharply.
Press curved seams over a tailor's ham or a seam roll, rolling the iron along the curve rather than on a flat board to preserve the crown's geometry and avoid unwanted stretching. Practise first on leftover panels to gauge how much pressure rounds the fabric. Trim seam allowances progressively with fine-point scissors, making controlled clips rather than deep cuts to prevent sudden release and puckering. Finish exposed edges with pinking shears or a neat overcast where appropriate, and pin trims evenly with short, balanced tacks. Block on a form covered with a damp towel to distribute tension. Keep pin spacing consistent; a brief re-steam will reveal any asymmetry early, allowing adjustment before permanent stitching. These small measures produce a symmetrical silhouette and add a subtle refinement visible at close quarters, making the piece suitable for garden parties and Royal Ascot.
Taken together, the preceding steps show that small, deliberate adjustments to block geometry, applied heat, and hand tools shape a cap's silhouette more than the fabric alone. A slight change to the block's radius, a measured burst of steam, or meticulous brim binding can alter the face, the fall, and the edge's crispness, as swatch tests reliably show.
Work through the sequence: choose the correct block, match tools to material, calibrate the amount of steam and the timing, shape and bind the brim, and finish with careful hand-finished detail. Run small trials and keep concise records, and you will arrive at silhouettes that sit cleanly on the head, improve with time, and suit daytime gatherings as well as formal events.