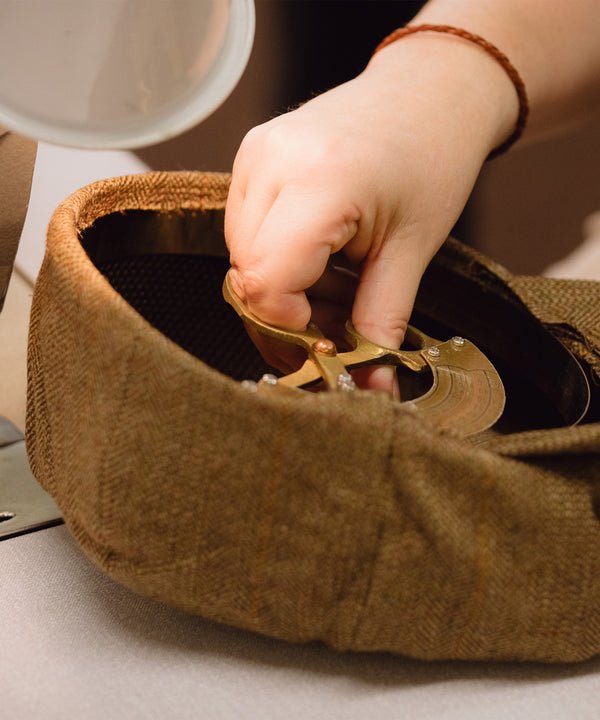
How to tell whether a British hat is hand-finished rather than mass-produced. Identifying the difference spares you misleading labels and reveals the maker's techniques behind fit, finish, and longevity.
This short guide sets out five clear signs to look for: fibre provenance and quality; hand-blocked shaping; linings, seams, and hand-set trims; edges and surface; and how to examine a hat in person or online. Apply these practical checks to assess construction, materials, and hand-finishing, whether you are browsing in a shop or studying photographs. These are the details that reward closer inspection.

1. Inspect the fibre's provenance and quality
Begin by asking for provenance: the fibre species, the mill or region of origin, and any batch or lot references. Hand finishing commonly accompanies a traceable supply chain rather than generic fibre claims, so precise sourcing often reveals as much about a piece as its stated material. Use simple tactile checks. Pinch the crown or brim to judge recovery and spring, and stroke the nap; high-quality natural fibres feel warm, resilient, and display a layered nap, whereas synthetic or recycled blends often feel flat and slick. Examine the structure with a loupe or under a strong light. In felt, look for long, tapered fibre ends and consistent staple length; in straw, seek tightly plaited, continuous strands. Short, blunt ends, broken fibres, or uneven plait joins indicate lower-grade or recycled material, the sort commonly found in factory production. Those signs become evident on careful examination.
After checking the fibre structure, examine the dye and finish in natural light. Look for subtle tonal variation, depth of colour, and a soft lustre when you stroke the nap first one way, then the other; perfectly even, flat colour often indicates machine dyeing. Lift the sweatband to inspect the felt or plait edge, the hand stitching, and any adhesive residue: neat hand stitching, tapered fibre ends at the brim, and slight, deliberate irregularities in density reveal hand finishing. Taken together, these physical clues, rather than labels alone, let you verify a hand-finished piece.
Choose hand-finished Merino felt for verifiable provenance.

2. Recognising hand-blocked shaping
Stand at eye level and inspect the silhouette, rotating the hat slowly to compare its profiles. Hand-blocked shapes often display minute asymmetry and lively contours, with small, non-uniform curves where machine moulding produces mathematically regular lines. Turn the hat over and examine the underside of the brim and the crown rim in good light; faint concentric tool marks, compression rings, or smoothing where the wooden block met the felt indicate hand shaping. Open the interior and search the sweatband for tiny hand tacks, pin perforations, and irregular stitch lengths. A strong lamp or a loupe will make these subtle details visible — the kind of evidence that rewards closer inspection.
After noting faint tool marks and irregular tacking, run your fingers across the felt nap, follow the brim roll, and press the crown gently. Hand-blocked pieces announce themselves in small, tactile ways: subtle changes in nap direction, a softer hand-rolled brim, and a natural spring as the crown returns to shape. Taken with slight asymmetry, faint tool marks, and uneven tacking, these signs indicate individual blocking and hand-finishing rather than machine uniformity. To be sure, rotate the hat, shine a bright light into the crown, and give a gentle flex, confirming the evidence with both hand and eye.
Choose a finely blocked felt hat that holds its line.

3. Inspect linings, seams, and hand-set trims for neat workmanship
Begin by lifting the lining at a seam to inspect stitch length and direction. Hand-stitched seams show slight variation, tiny knots, or discreet backstitches, while machine stitching is uniformly even and is often overlocked. Natural linings, such as silk or fine cupro, that are slip-stitched to the sweatband with small tacking stitches securing the crown signal hand finishing and permit future reblocking. Check inside the crown and beneath the brim for pad-stitching set at a subtle angle, with variable length and depth. This shaping contrasts with the flat, regular appearance of machine pad-stitching. These features show up on careful examination.
Beyond the seams, examine trims closely. Bows, ribbons, and feathers fixed with tiny, nearly invisible tacks, discreet slip-stitches, or individually stitched feather bases point to hand-setting; look behind trims for small thread ties or tiny stitch holes. Run a finger along the sweatband join and the underside of the brim to feel for fine tacking stitches and hand-set sweatband ends. Neat slip-stitching, rather than serged raw edges, is another sign of hand finishing. The absence of visible glue residue or heat-seal marks, and ribbon ends wrapped and stitched by hand, further support a hand-finished construction. By contrast, continuous rows of uniform stitching, overlocked edges, and mechanically identical finishes indicate factory assembly.
Look for refined linings and an adjustable internal pad.

4. Inspect edges and surfaces for subtle hand-finished details
Under low, raking light, inspect the brim edge for slight variations in profile, faint burnishing rings, or brush strokes in the edge finish that indicate hand finishing. Use a loupe or magnifier to study stitch lines and seams, outside and inside the crown, noting stitch spacing, needle entry points, and how thread ends are finished; tiny irregularities, tuck stitches at stress points, or discreet hand-locked ends will mark handwork. Finally, run your fingertips along the brim and over the surface nap to feel subtle transitions in texture, as a hand-finished edge often feels softened where the maker has smoothed or rolled the material, and the pile will change direction in worked areas rather than lie uniformly. Such features repay careful scrutiny.
Alongside surface inspection, turn the brim over and inspect the underside and the junction where the inner crown meets the brim for tool marks, trimmed fibres, or small areas of hand-applied adhesive or paint. At the very edge, seek faint cut lines, sanding marks, or overlapping brush strokes. Photograph edges close up and compare several examples to judge stitch rhythm, edge thickness, and burnish patterns; machine work is uniformly precise, while hand finishing leaves small, regular irregularities that become apparent on careful viewing. When possible, request process images, and favour tangible indicators of hand finishing such as varied stitch length, layered edge paint, or asymmetric burnishing, because consistent human characteristics across multiple views are reliable evidence of hand work.
Select the higher-polish option to reveal hand-finished detail.

5. Inspect the hat in person and via detailed photographs
Inspect stitch lines and seams closely. Request close-up photos or a short video so you can note slight variations in stitch length, occasional hand-tacks where trims meet, and thread that follows the curve of the form rather than a perfectly uniform machine run. Examine the brim edge and underside for burnishing marks, pin pricks left by blocking tacks, or a gentle waviness at the rim. A smoothly finished underside, with the brim turned or bound, typically indicates hand finishing, while raw, overlocked edges and unvarying stitch runs more often point to machine production. These small details reveal the method of construction.
To extend photographic inspection, request clear photographs of the crown interior and of the joins where the sweatband meets the body. Those views often reveal individual hand-stitches, neatly folded leather or fabric sweatbands, and hand-sewn linings rather than serged joins. Look for evidence that the piece was shaped by hand: gentle asymmetry, faint tool impressions, or the subtle halo left by steam and pressure. Scrutinise trims and attachments; hand-sewn ribbons, hatbands, or feathers will show small, purposeful stitch points and neat overlaps. Note the direction of the felt or straw nap. A brushed, directional finish with slight variation indicates manual working. If possible, ask for a 360-degree video in natural light so you can confirm these features from every angle and assess the workmanship for yourself.
A little practical observation and a few close tests will distinguish a hand-finished British hat from a mass-produced one by revealing the materials, shaping, and finishing choices that determine fit and longevity. Rather than relying on labels, carry out tactile checks and examine block marks, stitching, linings, and edges; those features reveal the maker’s methods at work.
To summarise, when assessing a hat, look for tangible signs of considered construction. Five useful checks are: 1. Fibre provenance and nap quality: Ask for the fibre origin and inspect the nap for evenness, density, and a directional sheen. High-quality felts and wools show a short, resilient nap that resists matting. 2. Subtle asymmetry from hand blocking: A hat shaped by hand will often carry slight, deliberate irregularities in the crown and brim. These are evidence of shaping rather than mass moulding. 3. Trims set by hand and variable stitch work: Bands, ribbons, and linings set by hand sit with a cleaner finish, and stitching may vary minutely where it has been worked by hand rather than produced by a machine. 4. Burnished or worked edges: Brim and edge finishing should look finished and smoothed, not raw or fraying. Burnishing or worked edges indicate attention to how the hat will wear over time. 5. Close-up images and handling: When buying remotely, request macro photographs and a 360-degree video. Where possible, handle the hat: cup the crown, feel the brim, and examine seams and joins. Use these checks to make evidence-based judgements about a hat's authenticity and likely longevity; details revealed by careful examination will usually be the best guide.