A cap that appears identical across takes is typically the result of several near-identical pieces, not a single lucky hat. Why do workshops produce multiple copies, and what does that reveal about the practical and artistic demands of filmmaking?
This post examines how makers and costume teams preserve cap continuity across takes, craft subtle variants to meet differing demands, age and finish pieces for screen realism, calibrate colour and texture for varying lighting, and label, track, and repair caps during production. It sets out workshop techniques and on-set practices that keep costume choices consistent, resilient, and visually convincing.

How to maintain hat continuity across multiple takes
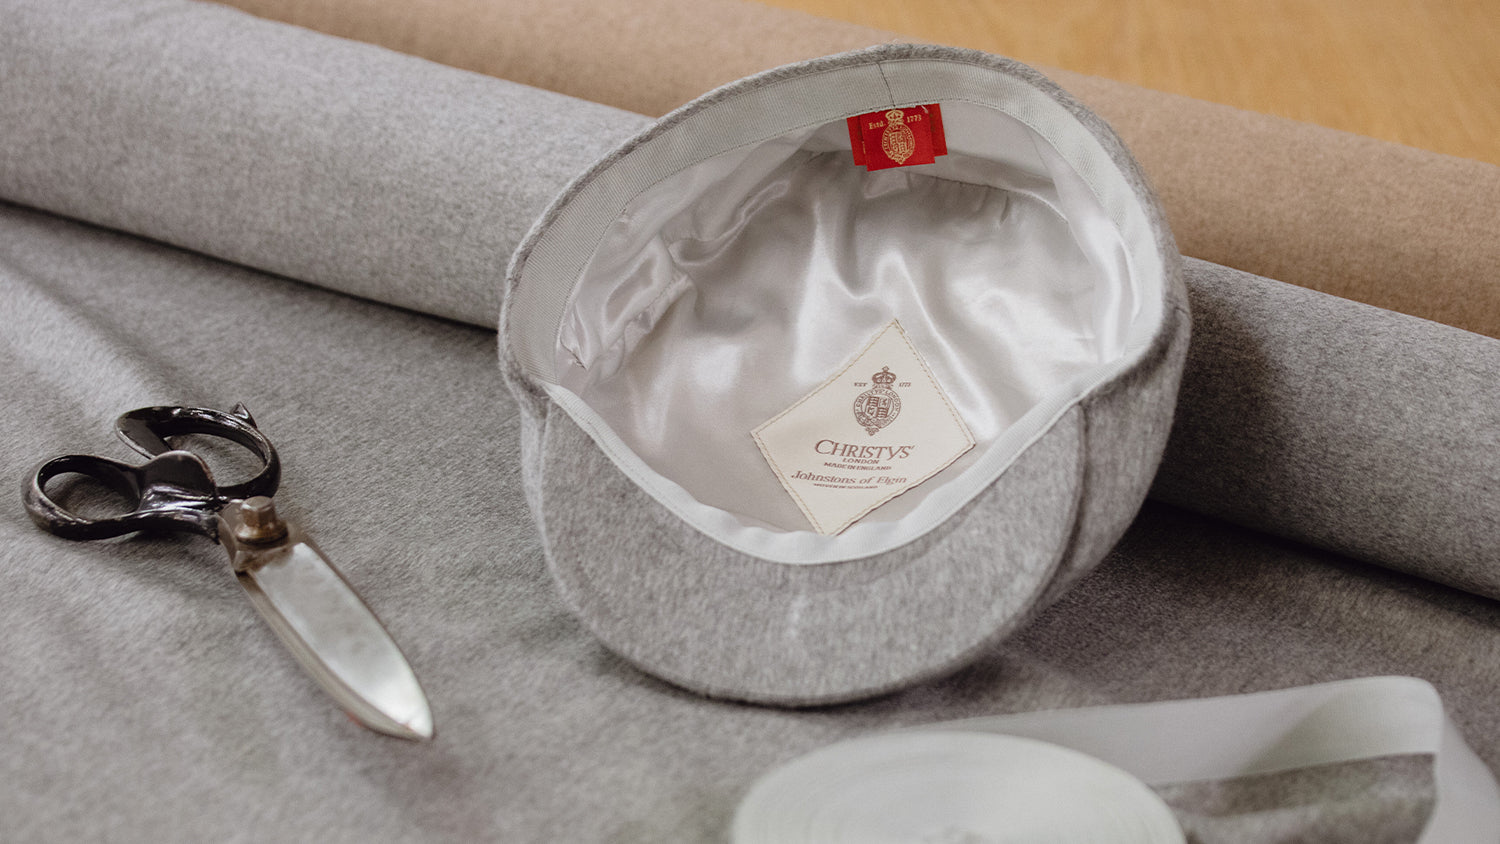
Workshops number and photograph each cap from multiple angles, including close-ups of stitching, labels, and wear marks, and attach those images to the continuity notes so any replacement can be matched precisely to a take. They make carefully matched duplicates and age or finish them with repeatable techniques, such as controlled washing, gentle abrasion, and measured staining, logging each method so copies share the same fibre compression, colour shift, and edge softening as the originals. Fit receives equal attention: crown depth, brim curvature, and the way the cap sits on the actor are measured; internal sweatbands are pre-stretched or padded, and adjustments are tested under the actual camera lenses and set lighting, because small differences read clearly in close-ups.
Teams keep distinct, clearly labelled sets for performance, stunts, and photographic coverage, so a dropped or damaged hat can be swapped without disrupting visual continuity. Stunt versions reproduce all visible details but are built to tolerate impact. Each numbered hat is stored in a labelled, breathable pouch with a record of the shot in which it appears, making retrieval straightforward during a shoot. A small repair kit for quick fixes to stitching, brims, and minor marks sits close at hand to prevent discrepancies between takes.
Add discreet interior inserts for a tighter, camera-ready fit.

How to craft cap variations with subtle differences in shape, trim, and finish
Building on continuity practices, costume workshops produce several near-identical caps to preserve continuity and allow for contingency. Sweat, rain, and physical contact can quickly alter a cap's appearance, so each copy is discreetly labelled inside, photographed on the actor, and logged for immediate replacement. A practical hierarchy governs their use: a finely finished hero cap for close-ups, heavier or distressed copies for action, and sacrificial pieces for stunts. To keep differences imperceptible, makers match crown shape, stitch patterns, and dye lot, and they document construction methods so a substitute reads as the same object on camera.
Material and lighting tests show how different fabrics and finishes respond to studio lights. Candidates are photographed under the intended rig, and surface sheen and texture are adjusted to avoid glare or colour shift. Fit and comfort receive equal attention: each cap is tried on the actor and on a blocking last, with sweatband position and stretch recorded, and a small run of closely graded sizes produced to accommodate hair, wigs, and costume changes. A concise asset-tracking catalogue, with photographs, scene notes, and repair history, keeps the wardrobe team aligned and speeds mid-shoot swaps. Labels sewn inside each cap, a compact repair kit, and one pristine spare allow deliberate wear to be applied without jeopardising continuity.
Choose a lightweight, structured linen cap for on-camera continuity.

Ageing and finishing caps for authentic on-screen realism
Productions routinely keep several near-identical caps because abrasion, sweat, and ordinary on-set wear will change a hat’s surface between takes. Continuity teams maintain a small range from pristine to well worn so each shot can be matched. Create that range with light abrasion and gentle needle fraying at the edges, dilute pigment washes or tea stains for a subtle patina, and targeted darkening of sweatbands with oil-based solutions. Trial each technique on spare material first, and favour reversible or removable treatments where possible. Photograph every sample in consistent lighting and catalogue the images so colleagues can confirm texture, contrast, and degree of wear at a glance.
Finishes behave differently in front of a camera. High-resolution sensors reveal brush marks; glossy areas produce conspicuous specular highlights; natural fibres accept dyes and age in ways synthetics do not. Because the camera reveals the detail that rewards closer inspection, run camera tests at the intended focal lengths and review the results on a calibrated monitor to judge scale and the legibility of ageing, then adjust your techniques accordingly. On set, number and photograph every cap with a scale for reference, keep a usage log linking each hat to specific scenes and stunts, and store alternates in breathable bags to prevent further change. Document material choices, stitching patterns, sweatband treatments, and any construction quirks so the workshop can reproduce them reliably. Finally, carry a small repair kit—matching thread, spare eyelets, and touch-up pigments—to allow discreet, rapid fixes between takes.
Practical cap ageing, continuity and camera readability checklist
- Ageing and distressing, step by step: always trial on scrap, then work from light to heavy — begin with gentle abrasion and targeted needle fraying at raw edges, follow with dilute pigment washes or tea stains applied with a soft cloth, and finish by darkening sweatbands sparingly with an oil‑based solution; prefer removable or water‑soluble treatments where possible, ventilate work areas, wear gloves, and photograph each trial under the same light.
- Continuity, inventory and rapid repair workflow: number and photograph every cap with a scale and consistent lighting, catalogue images and link each item to a usage log that records scenes and stunts, store alternates in breathable bags and rotate through a graded set of caps to match shot wear; carry a compact repair kit containing matching thread, spare eyelets, a needle or small awl, touch‑up pigments, spare sweatband liners, and a record sheet for quick handoffs.
- Camera testing and finish‑readability protocols: run camera tests at the intended lens lengths and distances and judge results on a calibrated monitor, noting any exposed brush marks or specular highlights; control highlights with mattifying sprays or diffusion, adjust dye or stain strength for fibre behaviour (natural fibres feather and absorb, synthetics may resist), and save test photos with settings so the workshop can reproduce the look reliably.

How to calibrate colour and texture for set lighting
Begin a lighting swatch process by making several near-identical caps, each with a small, deliberate variation in dye, weave, or finish. Photograph them using a fixed lighting setup, the same camera, and consistent white balance to discover which subtleties read as identical on camera. Retain the RAW files and annotated prints, and record spectrophotometer readings or neutral grey card references; inspecting spectral reflectance often reveals metamerism that visual matching under workshop lamps will miss. Test under the actual light sources intended for the shoot, whether tungsten, LED, or HMI, and review the captures to determine which variants hold their colour and which diverge when filmed.
Surface texture determines a hat's specular response. Alter pile height, tighten or loosen the weave, or change the finish to control sheen and the way highlights fall. Test every variant under both directional light and diffused light, and favour textures that produce predictable highlights the colourist can grade, rather than erratic glare that shifts between takes. To preserve continuity, make a small batch of near-identical caps, label each with measured characteristics and photographic references, and record which cap appears in each shot along with lens and camera settings so spares match precisely. Provide the grading pipeline with calibrated photographs, swatch cards, and instrument readings, and demonstrate how particular finishes interact with common LUTs and colour grades, since some surface behaviours cannot be fully corrected in post.
Use deep, lustrous fur felt for consistent camera highlights.

Labelling, tracking, and repairing caps during production
Assign each cap a unique ID and attach a discreet, waterproof tag inside the sweatband. Keep a daily continuity log that maps each ID to actor, scene, take, and any visible alterations. Colour-code tags, photograph every cap on a neutral head form, and take close-up images at the start and end of each shooting day so team members can match shape, wear, and provenance immediately. Record laundering cycles and repairs, and keep a short history sheet for every item to track how materials change under lights and handling. Those records will inform whether to repair, replace, or intentionally age a spare.
Assemble a focused repair kit for location work, and ensure at least two crew members are trained to perform four routine repairs. The kit should contain needles and thread matched to principal colours, spare trims, fabric glue suitable for camera work, sweatband material and removable pads, hat pins, a compact steamer, a hat block or former, and adhesive tape. The four quick repairs to practise are: restitching sweatbands, reattaching brims, tightening trims, and flattening crowns distorted by steam. Adopt material-specific care routines, and always test any cleaning method on an inconspicuous area first. Steam-shape felt and wool to restore form, spot-clean suede and leather, and hand-wash cotton and canvas where appropriate. Store caps on forms, or flattened in breathable bags, and record any shrinkage or colour change, since silhouette and hue matter more to continuity than an item appearing brand new. Keep several near-identical spares for each principal look, and document acceptable tolerances for fit, staining, and ageing. Carry discreet sizing inserts, removable sweatband pads, and basic colour-matching and distressing techniques so an ad hoc spare can be brought into line on set.
Taken together, these measures ensure several near-identical caps underpin on-screen costume continuity. Workshop teams preserve that continuity through measured duplication, repeatable ageing, careful calibration of colour and texture, and meticulous tracking and repair.
Headings such as continuity, crafted variants, ageing, colour and texture calibration, and labelling and repair set out the practical steps teams take. Each cap is numbered and photographed, finishes are trialled under the actual rig, and spares plus a compact repair kit are kept to hand. This measured attention to process makes minor variations predictable and ensures a hat reads the same on camera from take to take, whether you are making, supervising, or admiring a film.