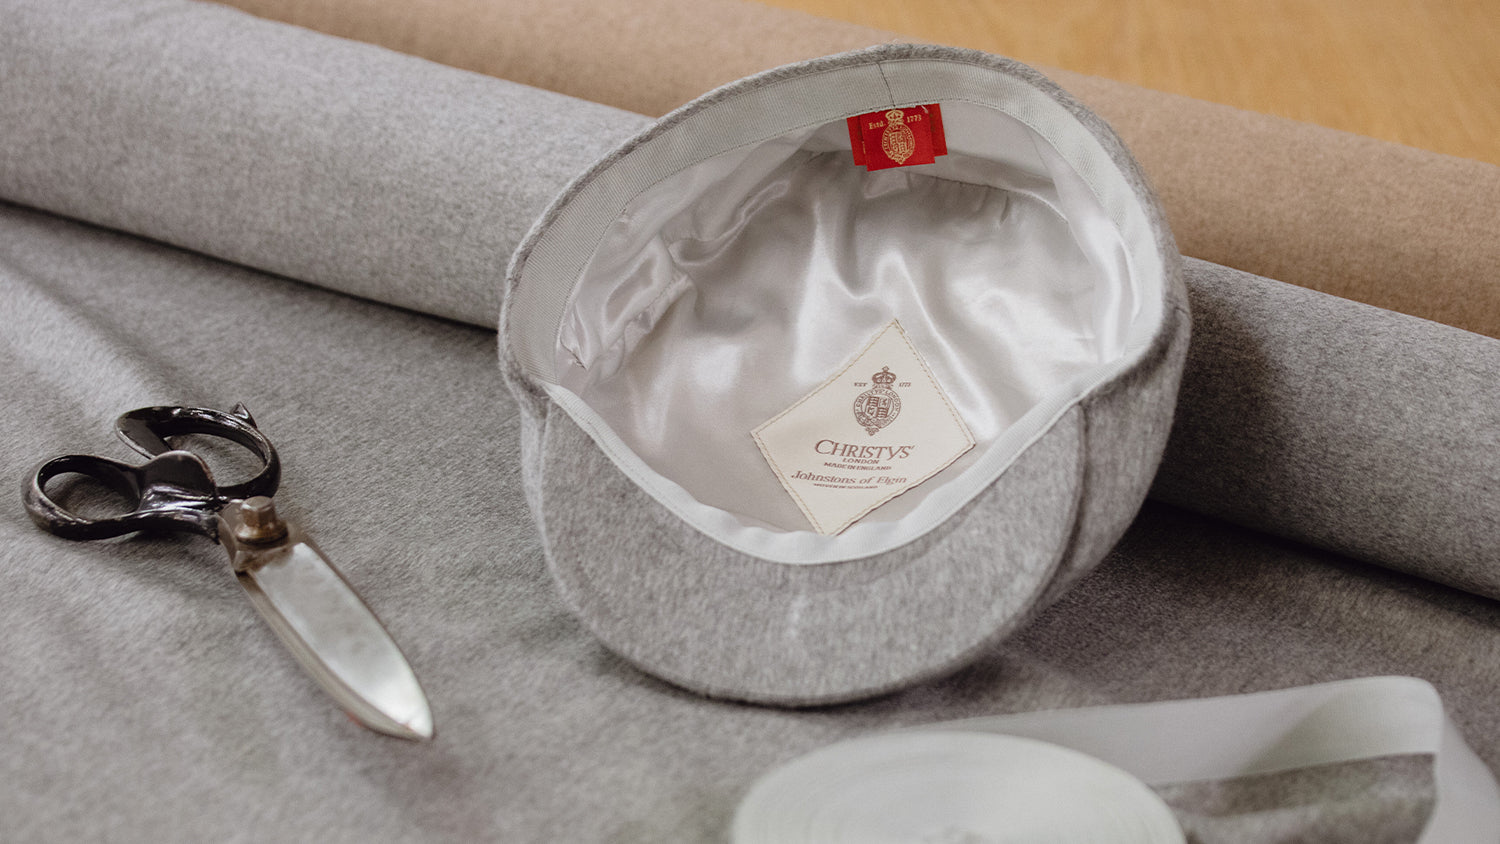
What makes the cap seen in Peaky Blinders both a convincing period piece and a compelling character prop is a confluence of craft: material and provenance, weave and surface finish, traditional blocking, brim stiffening, linings, and the hand finishing that shapes a precise silhouette.
This guide examines ten fabrics and construction techniques, such as fur felt, wool, tweed, blocking methods, and finishing steps, that give period caps their distinctive character. Whether you make, conserve, or study historical costume, the practical, archive-led approach offered here will help you discern authentic features, reproduce faithful replicas, and maintain continuity on set.

1. Define the era's silhouette and character
Begin by assessing the silhouette in concrete terms. Crown height typically measures 3 to 6 cm, brim width about 4 to 6 cm, and most caps have six or eight panels. The cap usually sits low and close to the forehead, producing a shallow, low-profile line. Measure with care: use a tape from the highest point of the crown to the inner brim, and measure brim depth from centre to edge. Photograph the cap head-on, in profile, and at a 45 degree angle so you can compare modern examples with originals. That compact form generally comes from narrow panel seams, lightweight canvas interlinings, and minimal stiffening. A small top button and subtle topstitching are reliable visual cues in photographs or surviving pieces, so inspect those elements first. Fabric alters the silhouette. Open-weave tweeds drape softer, while tightly woven wools and flat serges retain a crisper edge. Use a simple pinch-and-release test, and hold the cloth to the light to judge recovery and weave openness. These observations will guide cloth selection when aiming for a shallow crown. Attend to the small details — they are the ones that reward closer inspection.
Period-correct finishing details include a firm, thin brim with stitched edge binding, a low internal sweatband, and a sparse lining. Each element alters how the cap sits, how it tilts, and how it retains shape on the head. Those practical choices reveal the cap's social function: compact forms suited to mobile working lives, easily layered under outerwear, and conveying plain authority in contemporary photographs and museum examples, so consult archival images as reference points. For everyday wear, preserve the compact silhouette while introducing breathable linings, a slightly softer sweatband, or a discreet rear elastic to improve comfort without diminishing the cap's character.
Choose a low-profile tweed cap for compact, period-accurate silhouette

2. Research archival sources and consult costume departments
Begin with close archival work. Examine tailors' ledgers, clothing inventories, and photographic collections to extract fabric names, measurements, stitch terminology, and documented construction notes. Arrange access to museum textile archives to record fibre content, weave structure, lining, and interlining. Photograph samples under raking light to reveal seam placement and surface texture. Compile swatches, stitch samples, and pattern annotations into a single costume specification sheet that serves as an authoritative brief for cutters and milliners. This sheet should list sweatband dimensions, peak construction details, and agreed ageing treatments so every maker follows the same reference.
Run controlled prototyping sessions with the costume team to produce an authentic reconstruction, a stage-durable version, and a camera-ready variation. In each trial, record wear patterns, seam tension, and how each fabric behaves under movement and lighting. Use those observations to refine pattern pieces, adjust interlining, and set hand-finishing techniques so the hat reads correctly on camera and in performance. Consult conservation and dyeing notes to recreate patina and repairs: study common mending methods, natural-dye recipes, and laundering effects, and reproduce those finishes on test pieces. Perform stress and longevity tests, record every result on the specification sheet, and use the evidence to standardise maintenance and future reproductions.
Choose hand-finished wool felt for authentic ageing.

3. Source authentic textiles with documentable provenance
Catalogue period-appropriate fibres and weaves, requesting unwashed swatches for inspection by sight and touch. Seek fulled, tightly twilled worsted wools, coarse woollen tweeds, and napped flannels, and note twill angle and yarn twist as tangible clues to historic manufacture. Unwashed samples often reveal original finishing, nap direction, and milling choices that finished garments conceal. These details repay scrutiny.
After inspecting unwashed swatches and recording weave and finishing clues, begin by tracing the chain of custody on paper. Request batch numbers, invoices, and mill certificates from suppliers, and cross-check those references against museum accession records, auction catalogues, and textile archive entries. Documentary matches often confirm dates, mills, and finishing practices and reduce uncertainty about origin. Inspect the cloth itself for surviving markers. Intact selvedges, loom faults, header tags, and original dye-lot markings frequently persist on offcuts and can indicate mill origin or dye sequencing. These physical clues are the detail that rewards closer inspection. When uncertainty remains, seek non-destructive analysis and specialist interpretation: use binocular microscopy to confirm fibre structure, FTIR and dye analysis to identify materials and colourants, and a conservator's report to place analytical results in historical and technical context. Finally, favour sourcing routes that preserve provenance: deadstock rolls bearing original headers, reclaimed period garments, and small mills that retain pattern books. Always request production notes so you can understand how historical construction was achieved; those notes often explain finishing methods the textile alone cannot reveal.
Choose mill-woven herringbone for confirmed period authenticity.

4. Caps crafted from fur felt, wool, and tweed
Fur felt compacts into a dense matrix that holds crisp crown lines and a faint sheen. It yields a sharper, city-ready silhouette. Midweight worsted wool drapes and breathes, laying the weave clear and revealing stitch detail, making it well suited to a versatile, smart-casual cap. Tweed, with its twill structure and Donegal neps, registers as texture and repels light rain; it works best in layered country looks where pattern and nap read from a distance. Weave and surface choice amplifies these effects. Herringbone and twill lend linear movement, houndstooth and checks create graphic interest, and a napped finish softens highlights for evening or autumn wear.
Beyond material selection, the peaky look depends on careful construction: a multi-panel crown that has been steam-blocked, a sewn-in sweatband, a flat or sewn-down peak reinforced with internal brim stiffening, and neat topstitching that locks the lines into place. When examining a cap, check for even stitch spacing, symmetrical panel seams, and the absence of raw edges inside the crown. A properly steam-blocked shape will spring back after gentle pressure. Feel the inner band, ease the brim with a light pull, and note whether the lining lies smooth; these small tests reveal the quality of making. To preserve that appearance, dry-brush tweed with the nap, steam and reblock felt or wool when needed, spot-clean with a soft cloth and mild detergent, and store caps flat or on a low-profile form. Avoid machine washing and aggressive abrasion, which flatten the nap and blur the weave. Rotate your caps to reduce wear and help retain both appearance and fit. Often, retained original lines are what you will notice when you handle the cap, and they reflect the care of the construction.
Choose herringbone merino tweed for textured, weather-ready caps.

5. Choose the weave and finish that define a hat's character
Choose weave density to suit the cap's intended behaviour. A tight twill or serge provides structure and wind resistance, while a looser plain weave allows a softer drape. Assess recovery and abrasion by stretching and rubbing samples. Use fulling and milling to refine performance and shape retention: controlled felting tightens the weave, reduces porosity, and produces a firmer, harder-wearing cap that holds its silhouette after handling. Weave density and finishing together determine wear, water resistance, and how reliably the cap returns to its intended shape.
Alongside weave density, choose surface finishes to shape both touch and appearance. Brushing raises the nap, producing a soft, warm surface that traps light; calendering flattens the fibres by passing the cloth through hot rollers, yielding a subtle sheen that reads smarter in photographs. Finishing also changes colour and patina: oil or wax deepens tone and improves water resistance, while enzyme or stone washes mute colour and create a naturally aged surface that catches highlights differently. Plan nap direction and panel layout as part of these decisions, align pattern pieces consistently, and mock up the cap beneath a lamp to confirm seams and panels produce the highlights appropriate to the period.
Choose wool-linen for breathable cloth that retains structured shape.

6. Block and shape by hand using time-honoured techniques
Traditional cap-making begins with the crown being hand-blocked. The cloth is dampened and stretched over a wooden milliner’s block or rounded form, eased into place with a wooden mallet or a smooth cloth, then pinned and left to dry so steam and tension set a consistent, repeatable profile. The crown is cut from multiple panels on the fabric grain, and bulk is reduced with clipped seam allowances and either hand or flat-felled seams. This produces the rounded, fuller silhouette favoured in period caps while keeping the lines clean and avoiding added stiffness. Finally, an internal canvas or horsehair-style interfacing is tacked in and pad-stitched through the layers so the shape builds gradually and the cap holds its form without feeling rigid.
Correspondingly, the peak is built around a shaped insert of leather or layered fabric placed between the outer shell and the lining. Craftspeople steam-mould the assembly, then secure it with topstitching or blind hand stitches so the peak anchors the silhouette and resists collapse. A shaped sweatband stabilises the head opening, and edge binding prevents fray while keeping the rim crisp. Periodic steaming and reblocking on a purpose form refreshes the profile, preserving the intended shape without altering the construction.
Add foam inserts for a snug, silhouette-safe fit.

7. Stiffen the brim and fit linings to preserve structure
Test buckram, horsehair canvas, and laminated cotton on scraps to compare give, memory, and drape. Layer thin interfacings rather than a single heavy piece to tune stiffness, and stitch them in place rather than rely on adhesive; adhesives tend to harden with time and produce brittle edges. Shape the peak on a wooden or metal hat block, set it with steam, clamp the brim to the desired angle, and leave it on the block to cool and dry. This produces the crisp, downward sweep favoured on classic working caps. The combination of tuned interfacings and careful blocking preserves the curved profile through repeated wear, without creating an overly rigid cap that will crack or feel unyielding against the head.
With the brim stiffened and set, cut the crown lining on the bias and fit a moulded leather or cotton sweatband, understitching the lining to the inner brim so the cap conforms to the head and retains its silhouette without twisting. Reinforce seams and the brim edge with a perimeter topstitch or a close whipstitch, then apply a narrow grosgrain or cotton bias binding for a neat, durable finish. Place small bartacks where seams meet to prevent separation at stress points. For comfort and upkeep, specify breathable materials next to the skin, make the sweatband and lining removable for hygiene, and restore shape with gentle re-blocking using steam rather than heat or heavy pressing.
Choose a Bond-block tweed cap for durable comfort.

8. Hand-finish trims and details with care
Before any machine stitching, a craftsperson bastes the crown to the sweatband with evenly spaced tacks, then blocks the hat on a wooden form to check crown tension. The basting is replaced with a hand slip-stitch to lock the shape without machine-induced distortion. Along the seams and the peak, pick-stitching and hand topstitching in fine, waxed linen or cotton produce shallow, slightly irregular stitches that catch the light and permit micro-shaping. For the sweatband, an invisible lining attached with small ladder stitches helps the lining lie flat, while easing the leather band allows a snug, breathable fit that endures wear, creating a controlled, hand-shaped silhouette rather than a stiff, factory finish. These small, hand-finished touches reveal their character when seen up close.
For the brim, finish with hand-burnished leather edges, narrowly tacked braid, or a concealed wire, and hand-press the peak to produce a crisp, natural curve without stiffness. Trims receive the same attention: top buttons are hand-sewn, ribbon bands stitched by hand, and ornamental badges or loops secured with tiny backstitches so they sit neatly and withstand handling. These finishing choices are visible cues of handwork, subtle shaping control, and durability that characterise the cap silhouette associated with Peaky Blinders.
Consider a softly shaped, hand-blocked wool hat.

9. Achieve correct fit on set, preserve continuity, and ensure durability
Record and standardise fit using millinery-style measurements. Block each cap on a wooden or polymer hat block and photograph it from multiple angles, retaining one blocked example as the silhouette reference, since hair, wigs, and perspiration can alter perceived fit between takes. Create a numbered inventory and photographic continuity log, and tag each cap internally with a discreet code. Photograph each hat both on the actor and in isolation, noting scene numbers, camera angles, and any visible wear. Rotate identical, numbered caps to preserve on-screen continuity and enable costume staff to replace a hat without a noticeable mismatch.
To keep caps functional under production wear, protect a hat's high-stress points with considered reinforcement: use doubled seam allowances, bartacks at junctions, and stitched or riveted plates where the peak meets the crown. Fit a replaceable sweatband and employ stable interfacing to resist distortion, then validate those choices by simulating repeated dressing, stunt pulls, and routine handling. Pre-condition fabrics to set behaviour and colour. Pre-shrink and steam-block wool, prime tweeds to preserve their loft, and run humidity and heat trials to observe how materials relax or discolour under studio conditions. Choose liners that wick sweat and tolerate cleaning, because materials that look right when new can sag or fade after minimal wear. Plan on-set maintenance and rapid repairs. Keep a kit of spare sweatbands, matching thread, shaping tools, and a hat block. Assign a trained dresser to reshape wet or crushed caps, rotate spares, and record any ad hoc repairs in the continuity log, so ageing remains consistent across scenes. Attend to these points; small interventions repay a careful eye.
Use discreet inserts for a snug, consistent on-set fit.

10. Preserve the original, reproduce faithful replicas that honour the maker's work
Compile a thorough record for each original: high-resolution macro photographs made under both raking and diffuse light, exact measurements, stitch diagrams, and notes of any previous repairs. Together these elements form a blueprint for conservation, and where appropriate, for faithful reproduction. Carry out non-destructive material analysis. Examine fibres under a microscope, run pH and dye-fade assessments on linings, and compare weave density and yarn twist. Use these data to select contemporary substitutes that reproduce how an original hangs, wears, and ages. Stabilise items with reversible treatments, intervening as little as possible, for example with minimal stitching, cotton tapes, or discreet padding at strained seams. Store caps on shaped supports, wrapped in acid-free tissue, at stable humidity to prevent further distortion. Keep clear treatment records so future conservators can understand what was done, and avoid permanent adhesives unless specialist input deems them unavoidable.
For faithful replicas, recreate construction details and surface appearance by recording seam allowances, stitch types, interlinings, and pressing directions, then reproducing them on test swatches and toile blocks to refine fit and hand. Maintain thorough production records and discreet internal labels so replicas remain traceable, and retain a small reference sample stored under conservation protocol for future comparison. Map abrasion on brims and peaks, sweatband impressions, and colour loss to guide the reproduction of authentic patina on samples only. Do not apply ageing techniques to originals without specialist oversight.
The Peaky Blinders cap's precise, low-profile silhouette results from a deliberate combination of fabric, weave, surface finish, traditional hand blocking, brim stiffening, linings, and hand-finishing. Measured crown and brim proportions, tuned interlinings, and visible hand stitching are practical details that read clearly on camera and endure repeated wear.
Treat the ten headings as a practical roadmap: define the silhouette, research the archives, trace textile provenance, choose weaves appropriate to the design and use, block and stiffen thoughtfully, hand-finish the details, and plan for fit and continuity. Record each decision, run controlled prototypes, and maintain a continuity log so reproductions and conserved originals remain authentic in appearance, behaviour, and provenance.