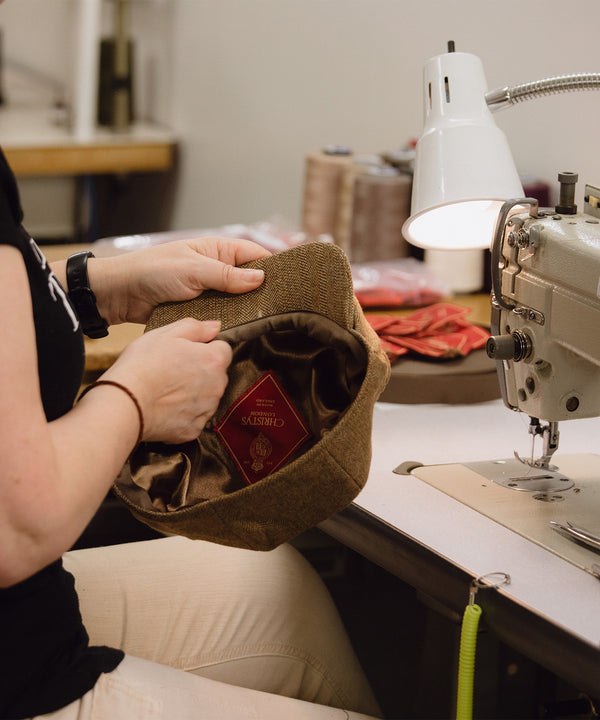
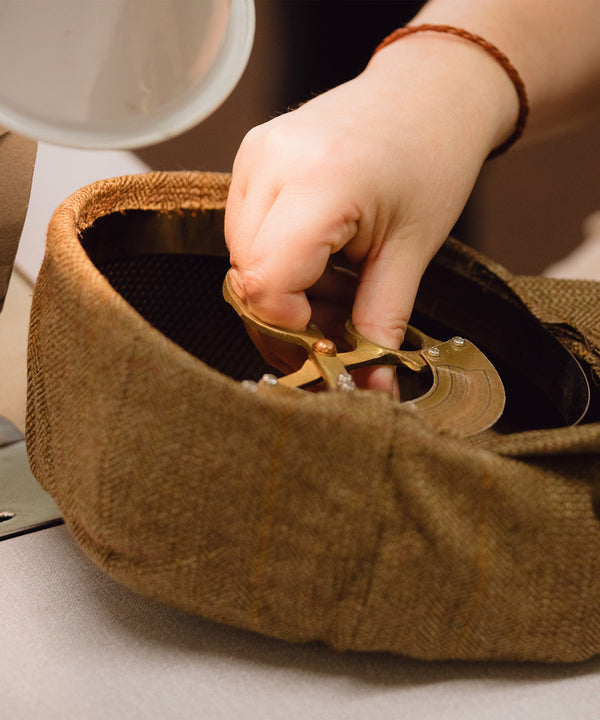
A cap can define an outfit, but poor fabric choices and weak construction soon leave it floppy or misshapen. Which materials, weave structures, and internal supports keep the crown crisp and the brim true, so the overall silhouette appears tailored rather than tired?
We explain how defined structure, fibre selection and weave density, interfacings and linings, and blocking and hand-finishing combine to determine a hat's rigidity and hand. Practical cues and simple touch tests follow to help you choose fabrics and reinforcement strategies that hold their shape and improve longevity.

Shaping the silhouette: how structure defines a hat's character
A cap's fabric and fibre structure determines its innate hold. Wool felt and boiled wool achieve crisp edges through tightly interlocked fibres and a dense nap, while canvas-backed cloth owes a sharp crown and brim to a tight weave and added backing. Cotton twill and straw, by contrast, have a looser weave or plaited fibres that allow easier moulding and gentler crease recovery, producing a softer silhouette. Panel count and pattern shaping further refine the outline: more panels permit gradual curvature and a smoother, rounder crown, while fewer panels create a flatter, boxier profile. For a tailored race day look, favour denser felt or canvas-backed cloth and a multi-panel construction that follows the head; for a relaxed weekend cap, opt for lighter twill and simpler panelling. These are the details that reward closer inspection.
Internal supports, such as buckram, horsehair canvas, or discreet plastic or metal inserts, determine a cap's shape memory. A stitched-in canvas generally outlasts a glued insert; the stitching spreads stress and copes better with moisture and movement. Ergonomics follow from construction: leather or dense cotton sweatbands, stitched in place, reduce stretch and help anchor the cap, while taped seams and reinforced seam heads limit compression and distortion. Blocking, steaming, and careful hand-finishing lock lines and refine edges. Store caps on a form, refresh their shape with controlled steam rather than soaking, clean with a soft brush, and leave persistent deformation to a professional for reblocking.
Choose blocked felt for a precise, enduring silhouette.

How to choose fibres for a hat's body and hand
Map fibres to the silhouette you want. Wool's natural crimp and scaled surface give it inherent recovery, so crowns and brims tend to spring back after compression. Worsted spinning produces a smooth face and a sharp edge; woollen or open-spun yarns relax that structure and soften outlines. Cotton and linen supply coolness and a crisp hand, but they lack wool's elasticity and crease more readily. For a summer-weight cap, choose tighter weaves or add an internal canvas or light interlining to restore shape without inhibiting airflow. Small percentages of nylon or polyester increase tensile strength and help the edge retain its form, while silk or cashmere refine the hand. Specify blends in the areas that take the most handling, such as the brim edge, the headband, or the crown panels.
Twill, hopsack, and basket weaves, together with higher yarn counts and tighter construction, give a cloth more visible body and greater stiffness than a plain weave. A hairy surface will soften and blur sharp lines, while sheared or boiled finishes sharpen edges and reduce pilling. Assess fabrics with a small set of repeatable tactile checks: scrunch and smooth to judge crease recovery, pinch to feel the spring, drape over the hand to assess fall, and inspect the reverse for interlining compatibility. Ask the mill about mercerisation, water-repellent treatments, and sanforisation, because those finishes change both the hand and the long-term silhouette. Use these observations to balance breathability, memory, and finish so you can aim for either a clean, tailored outline or a softer, lived-in look.
Choose a wool-linen blend for structured summer comfort.

How weave and density determine a hat's rigidity and structure
Weave and finish together determine how a hat fabric will sit and hold shape. Plain weave tends to soften and drape, while twill and canvas weaves lock yarns together to give more body; a dense twill or canvas therefore produces a crisper, more structured crown, and a looser plain weave yields a relaxed cap. As quick proxies for stiffness, compare yarns per centimetre and grams per square metre, written as gsm. Test small swatches physically: fold a strip and note the fold radius and springback — how sharply it creases and how quickly it recovers — and hang a square of cloth over your knuckle to see whether it forms a sharp angle or rounds away. These simple observations reveal more about behaviour than any specification alone. Finishes alter performance as much as weave. Calendering (passing the cloth between heated rollers), sizing, mercerising, and resin treatments increase stiffness and improve crease recovery. By contrast, stonewashing and enzymatic finishes soften fibres and reduce resistance to creasing. A light mist test is a useful final check: spray the swatch, let it dry on the knuckle or flat, and note whether the fabric rebounds or takes a permanent set.
Control a cap's shape with selective interlinings rather than stiffening the whole piece. Place buckram or laminated canvas in the crown, and use a softer interlining at the side panels to preserve comfort and contour. Use stay tape along seams and narrow topstitching to flatten joins without adding bulk. Match construction to material. Dense fabrics require longer stitch length, robust needles, and reinforced brim cores to prevent puckering, while lighter weaves permit closer stitching and minimal internal structure. Always sample assemblies and laundering protocols to verify that your chosen weave, finish, and interlining combination retains its tailored silhouette through repeated wear and care.
Controlling cap rigidity: material choice, internal shaping, and validation
- Use measurable fabric cues and simple swatch tests to predict stiffness: target yarns per centimetre and GSM ranges for your desired feel, prefer dense twill or canvas for a crisp crown and a looser plain weave for a relaxed cap, note that calendering, sizing, mercerising, and resin treatments increase stiffness while stonewashing and enzymatic finishes soften fibres, and verify with fold-radius and springback measures, a hang-over-knuckle angle, and a light mist test to check for permanent set.
- Shape selectively with targeted interlinings to preserve comfort and silhouette: place buckram or laminated canvas in the crown, taper or omit stiffening at side panels, add stay tape along seams and narrow topstitching to flatten joins without bulk, and match brim-core stiffness to fabric density to prevent puckering while maintaining contour.
- Align construction and testing to material performance: use longer stitch lengths and robust needles for dense fabrics, closer stitching and minimal internal structure for lighter weaves, run laundering and wear-cycle samples, record acceptance criteria such as crease recovery, springback, and absence of puckering, and iterate assemblies until the cap maintains its intended shape and clean lines.

How interfacings and linings reinforce a hat's shape
Interfacing choice largely determines the hat's silhouette. Woven interfacings give long-term stability and resist stretch, non-wovens provide lightweight structure, horsehair canvas lends springy resilience to brims, and buckram builds firm shapes. Cut test strips in light, medium, and heavy weights, fuse or stitch each to a scrap of the shell fabric, then bend, steam, and wear them briefly to assess recovery, drape, and comfort before committing to the whole cap. Match the interfacing's weight and hand to the shell fabric and to the intended crown depth or brim roll so the cap keeps a clean silhouette without feeling stiff or collapsing. Short samples reveal material behaviour under stress: horsehair springs back, buckram holds volume, and non-wovens soften with steam, which helps you choose the right balance for the finished piece.
Lining choices are part of a cap's structural system. Breathable cotton and cupro linings reduce internal friction and help the cap retain its shape; silk or satin ease donning and protect interior seams; a second, lightweight canvas layer provides discreet reinforcement. Cut linings on the bias to relieve pulling across the crown, and favour sew-in interfacings where repeated heat will degrade fusible alternatives. Hand-stitch the crown roll and underband to prevent shifting, then use topstitching and understitching to stabilise the edges. Shape curves and brims gently on the block, apply light steam, and allow the piece to cool so the memory sets. When a cap begins to collapse, renew the interfacing, restitch the underband, or insert a narrow internal strip, and store hats on a form or flat to preserve their silhouette between wears. Taken together, these practical steps protect fit and longevity.
Insert slim foam pads for a closer, stable fit.

How to block, finish, and maintain a hat's shape
With interfacings and linings chosen, blocking, finishing, and the interlining itself determine how a hat sits. Inside a hat, interlinings, whether canvas, buckram, or felt, govern drape and how well brim and crown retain their edges. Fused constructions lock fibre orientation, producing a crisp, stable edge. Canvas offers a gentle spring that preserves shape while allowing a little give. Felt depends on the entanglement of fibres to recover its form after compression. Because fused, woven, and matted layers behave differently, replacing or repairing the interlining is an effective way to alter crown and brim silhouette. Choose the construction that suits the profile you want, reinforce key stabilising points, and consider internal pads to reduce long-term distortion.
Reshaping a hat at home requires patience and a light hand. Steam the crown over a mould or bowl, gently stretch it to the desired profile, then pin or clamp until it cools and dries. Prefer steam for wool felt, whose matted fibres relax and rebind; use only light dampening for straw and bonded fabrics to avoid warping. Finish by shaving stray fibres, brushing, or hand-pressing to even the nap and sharpen edges. To reproduce a mill finish, brush lightly with a soft brush and apply controlled steam to settle the fibres without flattening the structure. Protect the shape by storing the hat on a proper hat stand or by filling the crown with acid-free tissue. Brush off moisture and allow gentle air drying away from direct heat, which can harden trapped adhesives and distort form. For minor repairs, reattach or replace sweatbands to correct crown compression, or use removable brims or silicone shapers to stabilise edge roll. If home fixes prove repeatedly ineffective, consult a local milliner for tacking or professional reblocking; overworking felt at home can thin the nap and weaken the crown.
A cap's silhouette is formed by material, weave, and internal support; each choice changes its memory, edge retention, and hand. Dense wool felt and canvas-backed cloth produce crisp lines and reliable springback, while looser twills and plaited straw yield a softer crown and brim.
Choose interlinings and construction to suit the cap's intended profile. Where a cap must hold its outline, favour woven canvas and stitched reinforcement; these materials give lasting structure, respond well to blocking, and resist distortion. Try swatches under the same wetting and shaping you plan to use, block gently into form, and keep the cap on a hat form when not worn so it preserves its tailored outline over time.