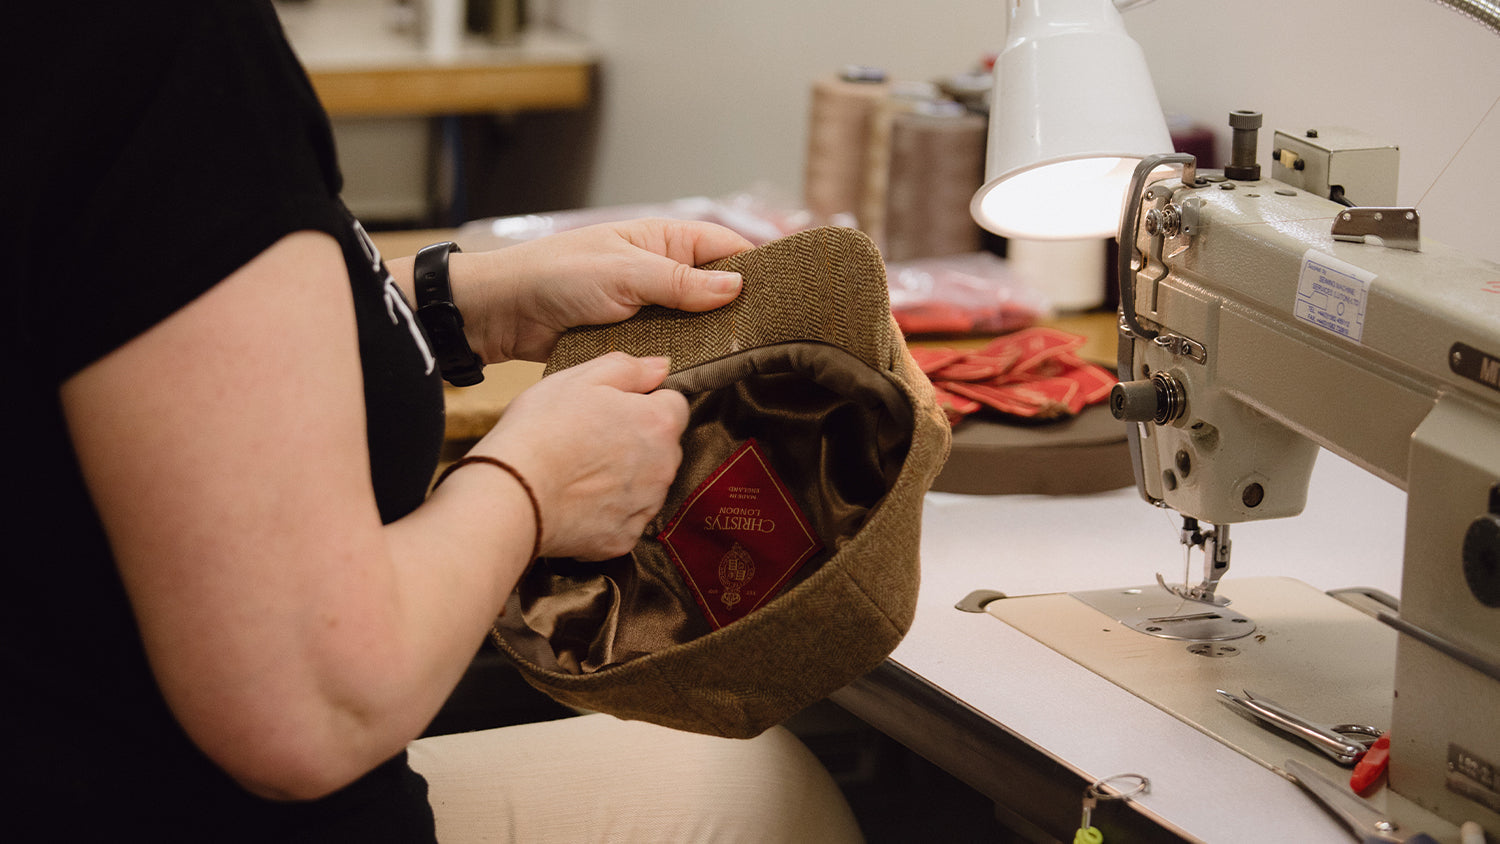
Why does one cap hold a crisp crown while another collapses after a few wears? The difference lies in construction: linings, internal stiffeners, and the weave work together to form the silhouette, maintain tension, and ensure shape retention.
This piece examines ten practical features, from fibre selection and weave density to blocking, interlinings, seam placement, and finishing, that determine how a cap gains support and holds its shape. It offers craft-led guidance on selecting materials, adding discreet reinforcement, and caring for a cap so its silhouette endures.

1. Define the hat's silhouette through considered, purposeful structure
Choose the weave and yarn with purpose. A tight twill or a high-twist worsted will resist flexing; an open plain weave will drape. Pairing a stiffer outer cloth with a lightweight cotton or linen lining concentrates structure in the crown without adding bulk. To assess memory, flex samples and note how quickly they return to shape — a simple test that makes recovery measurable at the workbench. Place stiffeners where movement concentrates: beneath the crown apex, along the underside of the peak, and inside the sweatband. Use a stiff interlining, such as buckram or a laminated cloth, and anchor it with bar tacks or reinforced topstitching so the hat retains form while allowing controlled hinge points. Engineer seams and stitch density to lock the layers together: increase stitches per inch at brim and crown joins, finish raw edges with binding or piping, and use quilting or channel stitching across multi-layer crowns to distribute tension and prevent local distortion. Let the lining manage moisture and longevity. Choose breathable natural fabrics, such as cotton, cupro, or silk blends, to wick sweat away from interlinings, and consider a removable liner or a stitched-in sweatband to protect internal layers and simplify maintenance. These details may be small, but they are the ones that reward closer inspection and ensure the hat holds its shape over years of wear.
Finish and set the profile by carefully blocking, steaming, and moulding the cap over a last, then secure the edges with binding or underwiring to resist fraying. Store hats on a form or stand between wears to preserve their lines, and reblock after heavy wetting to restore the original contours. Paired with deliberate interlining placement and precise stitchwork, these finishing and storage practices give the maker dependable control over rigidity and measured movement, helping the hat remain serviceable for years and rewarding closer inspection over time.
Choose a blocked hat for enduring, precise shape.

2. Choose fibres that retain a hat's structural memory
Structural memory rests on a handful of measurable fibre attributes: crimp, elastic recovery, modulus, and moisture regain. You can observe their effect with a few simple, repeatable checks in a shop or workshop. Scrunch a wool swatch and it will spring back within seconds; do the same with cotton and a crease will remain. That rapid elastic recovery, coupled with wool's natural crimp, is what allows wool and horsehair to take and hold shape. Keep a short battery of tests to predict long-term hold: crease recovery (compress and release, noting how quickly the cloth returns), wetting and drying (lightly dampen and let dry to see how the hand and weave alter), and a brief steam press followed by a cool set (apply steam, shape, and allow to cool to judge whether the form has been fixed). These simple observations reveal the fibre behaviour that rewards closer inspection.
The choice of yarn and the way a fabric is constructed determine its memory — that is, how readily it holds shape and how it recovers after bending. Worsted, tightly twisted yarns and dense weaves resist collapse; loose, open constructions will drape. If you want crisper lines, favour filament yarns or higher twist counts, and increase stitch density or weave count so the structure is inherently stiffer. Higher twist and density translate into sharper edges and quicker recovery after deformation. Make that memory reliable through finishing and setting. Synthetic yarns can be heat set to fix their form; natural fibres benefit from a light resin or size. Assess treatments on samples rather than assumptions: impose a repeatable bend or deflection, allow the sample to recover, and compare both immediate and delayed rebound. To gauge long-term behaviour, subject swatches to cycles of wetting and drying with a controlled press and cooling steam sequence — this simulates the repeated exposure a hat will experience over years and reveals how well a finish endures. Design choices can also improve careability and sustainability. Specify removable linings and replaceable stiffeners, or consider blends such as predominantly wool with a small proportion of heat-settable filament so the piece can be re-set with minimal intervention. Traditional options, such as a horsehair canvas interlining beneath a natural outer, add structure while remaining serviceable; test each construction for how easily it resets with a brief steam. These practical choices let a well-made piece hold its shape, be maintained without specialist surgery, and remain a considered object over time.
A woven brim holds shape and breathes in heat.

3. Match the felt or weave to the intended hat shape
Start by defining the target silhouette, then select material density and weave tightness to suit that shape. Dense, tightly felted or tightly woven fabrics will hold a crisp, higher crown and a sharp brim. Open, lightweight felts or softer plain weaves produce a relaxed, slouchy profile. Confirm likely behaviour with simple, hands-on tests. Compress and release a small sample to feel how quickly it recovers, and drape a swatch over a block to observe curvature and how seams read. These practical checks show how a material responds to shaping and wear. Consider fibre provenance as well. Fur felts and high-density felts compress less and resist water, so they sustain more formal shapes. Wool felts and looser weaves bend and recover more gently. Blends sit between these outcomes, offering a balance of hold and flexibility. Taken together, these observations help you match construction to the intended use and expected lifespan of the hat.
Consider cutting woven panels on the bias to encourage a smooth curvature, and orient the nap toward the crown peak in felt work to minimise seam show-through when the cap is blocked. Make a mock-up and set it on the block to read how seams and pattern direction behave, then adjust panel layout before the final cut so the finished line matches the intended silhouette. Match internal supports to the chosen fabric rather than applying a one-size approach: heavier felts often need minimal stiffening, while lighter felts and soft weaves benefit from targeted stiffeners at the sweatband, brim edge, or crown base to lock the profile. Finally, run simple wear and climate trials by exposing swatches to steam, gentle heat, and repeated handling to observe whether the material relaxes, puckers, or hardens, and where it responds well, use blocking to set shape with the least possible internal stiffening.
Choose blocked fine wool for a precise, enduring silhouette.

4. Control weave density to adjust fabric tension precisely
Weave density measures how many warp ends and weft picks occupy a given length of cloth, usually stated as ends per centimetre and picks per centimetre. More interlacements shorten the free length of each yarn, increase in-plane tension, and raise resistance to bending. As a result, a denser weave will generally hold a hat crown's shape more readily, feel firmer to the touch, and retain more warmth. A simple sketch showing warp and weft within a 1 centimetre square, or a quick loupe check to count ends and picks, gives a visual measure you can apply to any sample.
How a cloth holds shape is largely a question of weave and yarn density. A dense plain weave gives a crisp, even body, a tight twill trades some stiffness for lateral give, and an open weave increases drape and ventilation. The difference comes down to the number of contact points between yarns and the way forces distribute when the cap is curved or handled. To tune density, test three single variables. Use a finer yarn to raise the number of picks without adding bulk, tighten the sett or reed on the loom, or adjust pick insertion to achieve a closer pack. Make three swatches, each changing only one parameter. Block each swatch over a former, then compare rebound, seam behaviour, and hand to judge the trade-off between shape retention and comfort. Record both measurements and impressions so you can compare like with like. Run a few simple checks. Measure ends and picks with a loupe, steam and press the swatches over the former and note recovery, stitch seams to reveal puckering and needle resistance, and hold samples to the light to assess breathability. Use those results to choose linings and stiffeners: denser cloths allow lighter stabilisation and shorter stitch lengths, while open weaves demand stronger support, greater adhesive penetration, and different needle and stitch spacing. Finish by testing assembled swatches under simulated wear to confirm the combination performs in practice.
Choose a breathable, structured summer cap that keeps shape.

5. Set the shape by blocking and heat-setting
Blocking begins with stretching a damp or steamed cap over a wooden or metal block to realign the fibre scales so the crown and brim hold their new contours. Choose a block slightly larger than the intended head for a comfortable fit, and pin or baste the seams before allowing the piece to cool fully and dry. Heat setting affects fibres in different ways. Wool and other animal fibres respond to steam as their scales relax, which permits the hat to be reshaped, while many synthetic yarns soften under dry heat and can set permanently. Always test a scrap, and place a protective cloth between iron and fabric to avoid shine or melting. These tests and precautions reduce the risk of irreversible damage to the shell.
Allow the outer shell to shape freely by loose-basting the lining; pre-shape buckram or other interlinings to the blocked profile, and place stiffeners where they will take the strain. Pre-shaping ensures the interlining sits without gathering, while correctly positioned stiffeners distribute tension and prevent brim sag and seam puckering. A concise workflow suits workshops and home makers alike: gently steam or dampen the shell, block the crown to the desired profile, and set the brim separately on a suitable former. Insert the lining, secure it with temporary pins while the piece cools, then replace those pins with the permanent stitching once the shape has stabilised. Use clamps or elastic bands to maintain even pressure during cooling. For at-home refreshes, brief bursts of steam, a hat stand, and careful, patient hands will renew form without disturbing linings or stiffeners. Reblock after a thorough clean or prolonged wear, favouring minimal heat to refresh shape rather than aggressive restiffening. Keep a test scrap so you know how any particular fabric and interlining will behave before working on the finished piece.
Choose a precisely blocked wool hat for lasting shape.

6. Reinforce the hat's structure with interlinings and stiffeners
Choose a stiffener by the result you seek, not by its trade name. Open-weave buckram or horsehair canvas preserves a soft dome and allows the cap to breathe; a dense interlining yields a crisp, architectural brim. Test first on a fabric scrap to assess the hand, drape, and any change in colour before committing to the whole cap. Place reinforcement only where structure matters: stitch a narrow strip into the crown seam to support the dome, undersew the peak to form a clean curve, and bury a strip at the headband edge to steady the rim. Lock the layers with small tacking stitches or quilting lines so the stiffener cannot shift with wear; these modest interventions reveal their value on close examination.
Shape a cap through layering rather than by adding bulk. Combine a light fusible or needle-punched interlining with a soft lining to retain the fabric's surface texture and comfort while tuning spring and weight. Respect the weave direction: align the interlining grain with the base fabric's warp to resist distortion, and cut stabilising strips on the bias for curved panels so the cap sits smoothly. With highly patterned or open-weave cloth, favour underlining, that is sewing a second layer behind the face cloth, rather than bonding, since underlining preserves surface definition. Plan maintenance from the outset: hand-press seams, block the finished cap on a form, and refresh contours with gentle steam, and avoid dunking, which collapses interlinings. Fit a replaceable sweatband or a removable inner lining to protect reinforcements and extend the cap's life, creating a piece that is made to last and improves with time.
Tweak interior fit with subtle foam inserts

7. Fit linings and sweatbands to stabilise fit and absorb moisture
Measure the head, and cut the lining pieces 5 to 10 mm smaller than the shell panels so the lining sits under gentle, even tension. Mark notches to align seams, and use a 4 to 6 mm seam allowance for neat, consistent joins. Choose lining and sweatband materials for complementary performance: cupro or viscose linings will breathe and drape the crown, cotton twill sweatbands absorb moisture and stabilise the edge, and lightweight fusible interfacing or canvas inserts add local stiffness without bulk. These interior choices support the hat discreetly and embody subtle craftsmanship, while keeping the visible finish clean and stable.
Fit the sweatband with a gentle curve to follow the brow; secure it with an invisible slip-stitch or ladder stitch at the inner fold, anchoring the band at the quarter points to prevent rotation while keeping the join discreet. Sew narrow pockets or channels behind the front panel to accept thin, removable inserts, such as card or foam, allowing adjustment of firmness without altering the outer line and making future repairs straightforward. Align stiffener placement with the shell's weave: open, coarse weaves benefit from wider, softer linings to avoid show-through, while dense weaves take narrower, firmer stiffeners at the crown and sweatline. Always test on a scrap of the same material, press gently, and wear the sample to confirm the balance of support and drape.
Fit thin foam inserts for a snug fit

8. Reinforce brims and hand-finish edges
Select a stiffener to suit the brim profile: buckram or laminated canvas for a flat, crisp edge, a thermoplastic strip gently moulded with heat for a consistent curve, or leather or thin cork where a softer, more resilient roll is required. Trim the stiffener to the brim shape and sandwich it between the outer material and the lining. Baste by hand to hold the layers, then flex the brim to check its recovery. Once the position is secure, machine-stitch in two offset rows to distribute strain, and lengthen the stitches around curves to avoid puckering. Inspect the assembly as you work so the brim keeps a smooth, true line; fine work shows in the details.
Finish the brim edge with bias binding or a narrow piping cut to follow the curve. Clip the seam allowances at intervals to reduce bulk, understitch the binding (to prevent it turning away from the brim), press, then topstitch close to the edge to lock the profile and conceal raw fabric. Reinforce the crown-to-brim junction with a hidden stay tape or a narrow strip of canvas sewn into the seam allowance, and add a few small bar tacks at the primary stress points to prevent separation. Consider the weave and grain when laying out materials: place the tightest weave and longest yarns along the brim edge so the roll reads smoothly, and orient the stiffener across the grain so the brim resists distortion. Finally, finish raw edges with an overlocked or folded hem to prevent fraying and preserve a crisp silhouette. These small, considered details keep the shape true and demonstrate their quality when examined.
Choose a structured wool hat for precise, enduring brim.

9. Position stitches and seams to shape the crown
Panel layout and seam geometry determine a cap’s height and curve. Fewer, wider panels produce a smooth, rounded crown; more, narrower panels yield a closer, tapered shape. Moving a central seam toward the forehead, or angling seams diagonally, can lift the side profile. Cutting panels to follow the warp (threads running lengthwise) or across the bias (diagonally) changes the crown’s vertical resilience and spring. Make a muslin sample and, where possible, mirror the fabric’s weave across joins to check the silhouette, minimise visible mismatch, and observe how the material distorts with wear.
Stitch choice and density are practical shaping tools. Shorter stitches, twin rows of topstitching, and tighter tension bind fibres together and reduce flex, while longer stitches allow more give and movement. Integrate interfacings and stiffeners into the seam allowances, and under-stitch the lining so load disperses through the seams and edges remain flat. Grade allowances, clip or notch curved seams, and press each join to keep intersections neat. Reinforce high-stress junctions with stay-tape, bartacks, or narrow binding, and finish seam edges to prevent fray and gradual loss of shape. Where visible appearance matters, place structural reinforcement just behind the final seam line so the profile stays crisp while the hidden stitches carry the load. Carefully judged choices determine how a piece holds its form over time and become apparent in wear and detail.
Opt for structured wool felt to preserve a crisp crown.

10. Maintain shape through careful cleaning, storage, and reshaping
Store hats on a form or in a box with the crown supported. Stuff the interior with acid-free tissue, and cover the hat with a breathable cloth to prevent compression that can flatten the weave or bend internal stiffeners. Control the storage microclimate by avoiding direct sunlight, high humidity, and nearby heat sources. Moisture softens wool and felt, straw will shrink if allowed to dry out, and glue securing internal stiffeners can loosen with excess heat. When reshaping, work locally and gently. Test a small, hidden area first, apply a short burst of steam, then reshape the crown and brim on a wooden block or an appropriately sized bowl. Allow the piece to cool and dry on the form before handling, and repeat only if necessary, since excessive steaming stresses fibres and bonded joins.
Keep linings and sweatbands fresh by blotting salt and oil promptly, hand-cleaning linings with a mild detergent where appropriate, and replacing compressed sweatbands. A clean lining prevents perspiration from reaching the stiffeners and fibres, which reduces long-term distortion and helps preserve weave tension. Inspect caps at the first sign of wear and repair small faults promptly: re-stitch loose linings, and re-seat or replace narrow stiffener tapes. For more substantial loss of shape, a professional re-block will restore the cap without altering its original weave or profile.
Shape in a cap is not accidental; it is engineered. Fibre memory, weave density, and the placement of linings and stiffeners determine whether a crown springs back or collapses. You can predict and control that behaviour with simple, repeatable checks: crease recovery, counts of ends and picks to confirm weave density, blocking trials, and targeted stitching. Anchoring interlinings at hinge points ensures the layers work together, rather than against one another — a detail that separates a shaped cap from one merely assembled.
Consider the ten headings as a practical checklist, from fibre choice and weave density to brim stiffening, seam placement, and care routines, and test each decision on a sample swatch before committing to final construction. Small, considered adjustments, such as selecting a higher-twist yarn, increasing stitch density, or fitting a replaceable sweatband, combine to preserve a cap's intended silhouette through wear and maintenance.