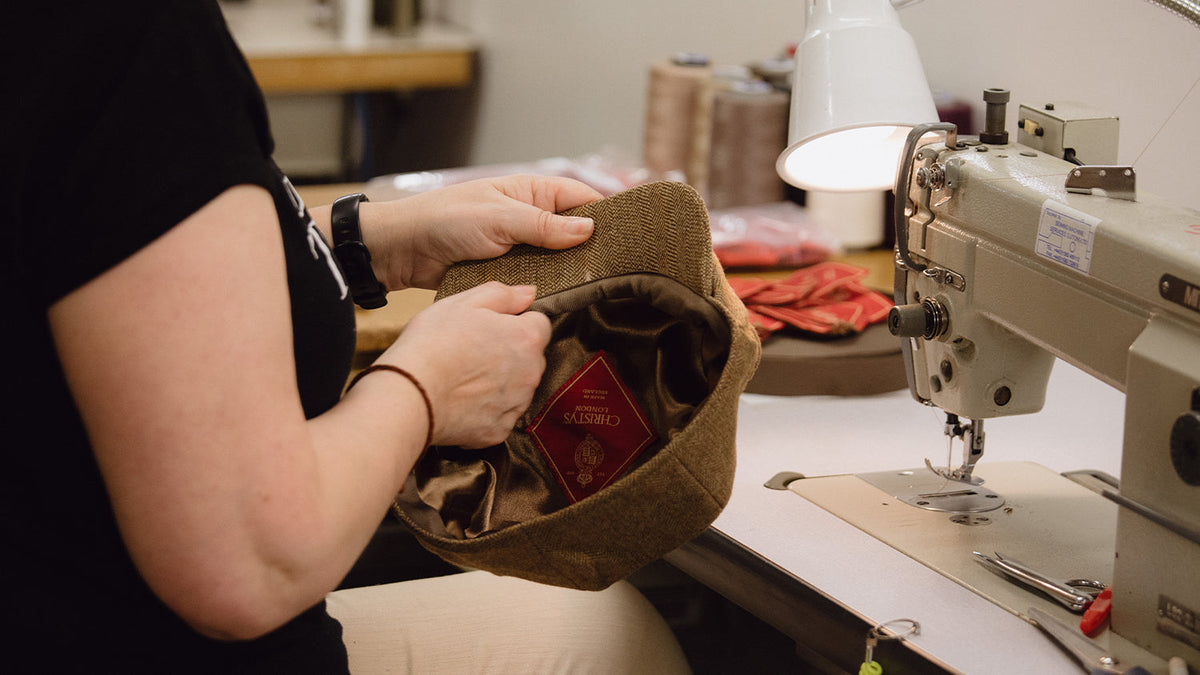
A flawless hat begins long before the block, with a maker reading cloth to find the thin spots, slubs and snags that will betray a finished shape. How do experienced eyes and hands pick out those hidden faults, and how do they decide whether to mend, reorient, or reject a piece of cloth?
This post sets out visual and tactile techniques for examining hat materials. It explains how to read the weave, assess fibre content, and follow the nap; how angled light and subtle surface cues bring faint faults into view; and how deliberate, precise handling reveals defects a quick glance will miss. You will learn to mark faults, plan an efficient cutting layout, and choose between repair and rejection, so finished hats endure and your workflow avoids wasted effort. The attention given here is the detail that rewards closer inspection.

How to spot thin spots, slubs, and snags in fabric
Skilled hatmakers inspect cloth both visually and by touch. Hold the material up to oblique light to reveal local translucency, drape it over a curved surface to note tension lines, and pass the fingertips and thumb along the weave to locate thin spots, slubs, and snags. Use a loupe to distinguish slubs from true faults: slubs present as intermittent irregular bundles that add texture, whereas thin spots show local translucency or weakened yarn when stretched, and a close magnified view confirms yarn direction and density. Map any defects onto the pattern or over the hat block so seams, crown pins, or brim edges avoid compromised areas, or plan reinforcement where avoidance is impossible. These are the small, considered checks that reward closer inspection.
Choose remedial action according to defect type and location. Back thin areas with canvas or interlining, stabilise snags with fine hand-stitching, and embrace slubs when they contribute character; such subtleties become apparent during handling. Always test interventions by blocking before the final trimming so you can assess drape, tension, and overall appearance under working conditions. Photograph defects under consistent, oblique lighting, note their frequency per metre and their repeat interval, and record cloth-lot details to establish provenance and inform future sourcing. Those records then feed back into quality control, helping to detect systemic issues before they reach the workbench.

How to analyse weave, fibre content, and nap in hats
Begin with a considered inspection against a bright window or under a loupe. Look for a tight, even interlace and uniform yarn thickness; these qualities generally resist holes. Visible gaps, broken yarns, or long floats indicate areas likely to thin. Run a fingertip across the surface, then hold the cloth to the light. A brighter, semi-translucent patch shows a worn warp or weft. Raised, irregular bumps reveal slub yarns, and hooked fibres or loops point to recent or recurring snags that will enlarge with wear. Examine fibre morphology under magnification: cotton appears ribbon-like, wool shows small scales, and silk reads as smooth and filamentous. Reserve a controlled burn test on a tiny, hidden sample only as a last resort, taking sensible safety precautions and noting the smell and the ash. Finally, brush the cloth to check nap and pile direction, watching how the light reflects; this helps when aligning pattern pieces so seams do not show and areas do not wear differently over time.
After that initial inspection, observe three things: weave tightness, fibre type, and the behaviour of the nap. A tight weave and resilient fibres will resist abrasion and pilling; loose weave and softer fibres will show wear sooner. Let those cues direct your interventions. Gentle laundering and reinforcing patches suit areas with a loose weave. Careful trimming of surface pills and reblocking address piled surfaces. Targeted darning to the warp or weft can arrest thinning before holes form. Prioritise repairs where light, touch, and magnified inspection reveal weakness; addressing those points early extends a hat's life and keeps repairs discreet.

How to inspect fabric by observing light and surface texture
Inspect cloth from two light angles. Hold a sample to a bright window so transmitted light makes thin areas read as translucent patches. Then lay the cloth flat and use a low, raking lamp to exaggerate surface texture; this brings out slubs, raised fibres, and small depressions that head-on lighting can conceal. Follow with tactile checks: stretch a small square gently between thumb and forefinger and slide a fingernail across the yarns. Weak areas will thin, fuzz, or ladder, while snags will catch or curl into a loop. Finally, examine the cloth with a loupe, a white backing card, and fine tailor's chalk or a removable marker to reveal broken filaments, make subtle translucency obvious, and map defects for later pattern placement or repair.
Read fabric type as a diagnostic clue. Linen and slubbed silks reveal thicker yarns that register as intentional texture, whereas knits and worsted wools tend to show snags and thin spots more readily. Note whether a fault follows the warp (the lengthwise threads) or the weft (the crosswise threads); repeated faults along one direction commonly point to a loom or yarn-supply issue rather than to random damage. Let that evidence determine your cutting and repair strategy: shift pattern pieces to avoid small, isolated thin spots, stitch or back linear faults that run along a seam, and secure snags that are opening into loops to prevent laddering. Record fault positions on a template so layout choices survive the cutting table, and so any later repairs proceed from the same plan.
Inspection, diagnosis and next actions for cloth
- Use a two-stage lighting routine: hold the fabric to a bright window to reveal transmitted light, where thin areas appear as translucent patches; then lay the cloth flat and employ a low, raking lamp at shallow angles to exaggerate surface texture, making slubs, raised fibres, and small depressions visible. Position a loupe with a white backing card behind fine areas to make subtle translucency obvious.
- Follow tactile and magnified checks: cut a small square, stretch it gently between thumb and forefinger, and slide a fingernail along the yarns; weak zones will thin, fuzz, or ladder, while snags will catch or curl into a loop. Use the loupe to locate broken filaments, and a fine-tail removable marker or chalk to mark and map each defect.
- Read fabric clues to diagnose cause: treat thicker yarns in linen and slubbed silks as intentional texture, while rapid snagging or thinning in knits and worsted wool points to wear or handling damage. Note whether faults run with the warp or the weft; repeated faults along one direction suggest loom or yarn supply issues rather than random use.
- Turn findings into cutting and repair choices: shift pattern pieces to avoid small, isolated thin spots, place seams over linear faults and stitch or back them, and secure snags that could open into ladders. Record defect positions on a template so layout decisions and subsequent repairs proceed from the same map.

How to identify imperfections through careful, precise handling
Experienced hatmakers begin with a studied, tactile inspection. They drape a metre-length sample between their hands, pinch gently, and slide their finger pads along the warp and weft, the threads that run lengthwise and crosswise, to detect yielding areas that signal thinning and small lumps known as slubs. Backlighting or a low-angle view against a bright window makes thin spots appear translucent and casts tiny shadows from slubs, which a hand lens, or loupe, will confirm by revealing uneven yarn thickness or missed twists. Under mild tension, thin areas give more readily while snags show as raised loops or shifting threads. Taken together, these physical checks form a precise map of visible and tactile faults before any intervention.
Mark defects on the wrong side with temporary chalk or headed pins, and record their distance from the selvedge and from adjacent seams. Note precise measurements rather than impressions: exact placement aids a more considered assessment of repair options. Fault patterns provide telling clues to cause. Regularly spaced slubs suggest uneven spinning; isolated thin patches point to abrasion or a loom misfeed; linear runs indicate weak filament or a finishing fault. Use these diagnostics to decide whether to stabilise the area with local darning, introduce a reinforcing interlining, position faults on less visible panels, or reject the cloth.

Note faults, plan the layout, and decide on repair or rejection
Skilled hatmakers begin by holding the cloth to an even, bright light and smoothing it with thumb and forefinger to reveal translucent bands, thin patches, snags, and slubs. A loupe confirms yarn breaks and uneven twist. Faults are marked and mapped with a quick sketch, coded notes, tailor's chalk, temporary tacks, and photographs taken with a ruler, each image annotated with the distance from the selvedge and the bolt end so cutters can place pattern pieces deliberately. This audit trail removes guesswork from yield calculations and supports evidence-based decisions when planning the layout, a small ritual that improves accuracy.
Begin layout by placing high-visibility panels where the material is clean. Rotate sections where the grain permits, or position seams and style lines to conceal minor faults. Reserve less attractive strips for linings, brims, or offcuts. Use clear, repeatable criteria when deciding whether to repair or reject: note a flaw's position relative to stress points and visible faces, measure its extent and recurrence across the width, and test the proposed repair on a scrap to judge drape, hand, and seam strength. Small snags in seam allowances can be drawn through to the reverse and secured with fine, discreet stitches. Flattened slubs often respond to an underlining or canvas, and small holes may be reweaved and finished with neat hand stitching. Record the decision and the corrective action taken to preserve provenance and provide an audit trail should the batch be queried.
Careful inspection under oblique light, with a loupe and by touch, allows makers to pinpoint thin spots, slubs, and snags, and to decide whether to reorient, reinforce, or reject the cloth. Recording positions, photographing defects, and marking templates turn those observations into repeatable quality control, preserving yield and consistency.
Consult the sections on visual cues, tactile technique, and repair strategy to inform layout decisions and carry out small trials before committing to blocking. Photograph faults, trial any repair on scrap material first, and record the results; this documentation helps a finished hat retain its shape and appearance, and preserves a clear record of its provenance.