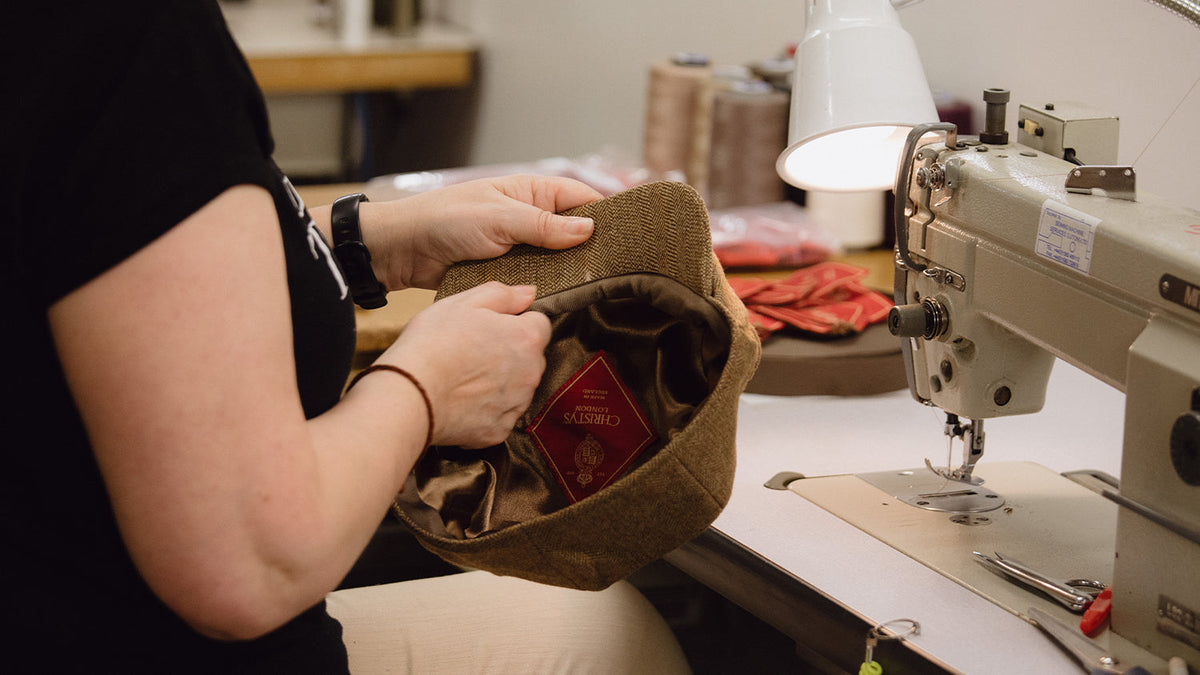
A well‑worn hat can sag, pinch, or lose its profile after only a few wears. The cause is often unseen: lining choice, the fit of the sweatband, the weight and placement of interlining, and stitch patterns govern tension, edge resilience, and overall comfort. These are the details that reward closer inspection.
This post examines ten practical techniques used by experienced milliners and hatters, from material selection and canvas reinforcement to stitch placement, brim finishing, and ventilation. These methods improve breathability, aid moisture control, and help retain a hat’s long-term shape. Practical maintenance and storage practices are described to preserve fit and profile.

1. Choose structured materials that retain their shape over time
Opt for firm, tightly woven face fabrics, such as worsted wool, dense cotton canvas, or twill. A simple pinch-and-release test will show which materials spring back and retain crisp edges in collars, brims, and jacket fronts: pinch the cloth between thumb and forefinger, then release and observe the recovery. Introduce internal canvases, for example horsehair or linen canvas, in the chest, lapel, and other tailored areas to distribute tension and preserve the roll and overall structure. Match your choice of interfacing to the movement you require: woven or canvas interfacings move with the shell, while non-woven fusibles provide instant stability but can stiffen or delaminate over time. Always test any interfacing on a small swatch, subjecting it to heat and laundering, so you can judge its effect on drape and recovery before committing it to a whole garment.
Also choose durable sweatband materials such as leather, cotton twill, or suede-backed fabric. They should absorb moisture, mould to the head, and retain their shape through repeated wear. Fit sweatbands with sewn-in attachments and reinforce stitching at high-stress points. Balance structure with comfort by pairing stable outer fabrics with smooth, lightweight linings that reduce friction and share similar shrinkage behaviour with the shell. Add stay tape or grosgrain at the shoulders, seams, and hems to prevent stretching while preserving a clean silhouette.

2. Match the lining to a hat's drape and structure
Match lining weight and fibre to the outer fabric. Lightweight, slippery linings such as silk or viscose preserve the hang of soft, fluid cloth, while heavier, more stable linings lend support to wool and other structured coats. Choose a full, partial, or floating lining according to the balance you want between structure, warmth, and breathability: full linings preserve tailored lines through the garment, partial linings stabilise shoulders and waist without encasing the whole shell, and floating linings are fixed at key points so the outer fabric can drape naturally. Use underlining and targeted interfacing to build shape without bulk; underlining supports sheer fabrics, and sew-in or lightweight interfacing adds local rigidity at collars, facings, and shoulder seams. Cut the lining with attention to the grainline, or on the bias where greater drape is required, and allow wearing ease at the shoulders, centre back, and sleeve heads so the lining moves with the wearer.
Trial techniques on scraps before committing to a finished piece. Pin a lining sample to the garment to feel how it alters the hang, and try any fused interfacing on a scrap, since it often stiffens fabric and changes drape. Stay-stitch bias edges, then baste and wear-test before final stitching. Use slip-stitch hems and anchoring stitches at seamlines so the lining can move independently without distorting the outer fabric. These small choices in attachment and stitch placement reveal themselves in motion, preventing ride up, reducing pull, and preserving the intended silhouette.

3. Fit a sweatband for improved comfort and moisture control
Different sweatband materials behave distinctly in wear. Terry cloth soaks up sweat and feels soft against the skin, but it holds moisture and takes longer to dry. Leather absorbs natural oils and helps a hat maintain its shape, although heavy perspiration may cause it to stiffen. Modern moisture-wicking knits move moisture to the outer layer and dry quickly. Match the material to the occasion and activity: a lightweight knit for long outdoor days, terry cloth for short, intense exertion, and leather for formal occasions that require structure and longevity. To check fit, measure head circumference at the brow, allow around 5 to 10 millimetres of compression for a close, comfortable fit, and position the sweatband so its top edge aligns with the natural hairline. A wider band spreads pressure and supports the brim and crown, while a very thin band concentrates force and may deform finer brims. The choice of sweatband affects comfort, fit, and how a hat ages; it is a detail that rewards closer inspection.
Construction and attachment determine both moisture management and longevity. Parallel channel stitching, quilted lines, or narrow leather perforations create air paths; flat seams and soft edging reduce pressure points. Machine-sewn channels tend to trap less heat than continuous glued strips, and stitched attachment points hold the band more securely under heavy perspiration. Choose a removable sweatband fastened by discreet snaps or a stitch-through hem so it can be laundered or replaced; when refitting, hand-stitch it carefully to preserve the hat's internal shape. Bands with thin foam cores or graded padding distribute pressure across the forehead and temples, and fabrics with odour-resistant finishes, together with regular airing and spot-cleaning, limit bacterial growth while maintaining the intended silhouette.

4. Use interlinings and canvas to reinforce the hat's interior structure
Opt for sew-in horsehair or open-weave canvas in chest pieces, front panels, and hat brims where long-term shape and steam recovery matter. Reserve lighter, fusible interlinings for collars, cuffs, and casual garments where reduced bulk and quicker make-up are priorities. Garments with sewn canvas typically retain lapel roll and shoulder line after repeated wear and pressing, which demonstrates their greater resilience compared with fused options. To compare the trade-offs in practice, fuse one scrap and sew another, then subject both to strong steam and a gentle wetting. You will observe that the fused piece saves time and reduces bulk, while the sewn canvas tolerates repeated steaming and reshapes more reliably. Choose according to your repair and longevity priorities.
Pad-stitch to anchor the canvas to the facing, using short, diagonal stitches directed toward the roll. Concentrate dense, close stitches in lapels and along brim edges to define the roll, and use longer, sparser stitches through the body to allow gentle movement. This combination gives structure without a boardy finish. Cut the canvas on the same grain as the outer fabric to prevent twist, and clip and grade seam allowances so curves ease without bulk. Tack the canvas into the seam lines before final stitching so the outer fabric and interlining move as one when shaped with steam. Pre-shrink and press interlinings before assembly. Lock the canvas to the facings with catch-stitching and edge-stitching, and fit breathable linings or sweatbands where perspiration concentrates so the interior will wick moisture and the structure will retain its form.

5. Optimise stitch patterns, seam placement, and thread tension for longevity and a neater finish
Match stitch type and length to both the fabric and the seam's purpose. Use shorter stitches on curves and high-stress joins; they spread load and reduce thread breakage. Slightly longer stitches work better on soft, draping fabrics, as they distribute tension and avoid perforation. Always sew a scrap, load it by hand, and inspect for puckering, seam slippage, or fibre tear to confirm the setting. Place seams along structural lines rather than across them so shaping seams, gores, and princess lines carry tension. For headwear, locate sweatband joins and crown seams away from high-contact zones to slow distortion and preserve the piece's shape.
Begin by balancing thread choice and machine tension. Test with a representative sandwich of outer fabric, lining, and any interlining, and adjust the top thread and bobbin until seams lie flat without puckering or loose loops. Stabilise selectively: stay-stitch curved edges, understitch linings to prevent roll, and add narrow reinforcement tape or bar tacks at stress points such as sweatband ends and pocket corners. Plan the stitching sequence to lock the shape and minimise distortion. Understitch and press critical seams before final assembly, clip and notch curved allowances so they sit smoothly, and use intermittent basting to hold linings and sweatbands in place while you finish. These measures reduce tension at the seam and help the piece retain its intended contour during and after construction.

6. Reinforce brims and hand-finish edges to preserve shape
Begin by inserting a buckram or woven stiffener as a structural scaffold and baste it to the brim. Shape the brim over a block with steam, then secure it with stitching set close to the edge so the brim retains a crisp profile rather than sagging. Sew a petersham or grosgrain ribbon under the brim and around the crown edge, positioning the ribbon on the cross grain for dimensional stability; stitch through both layers, then topstitch to lock the shape and conceal raw seams. Finish raw edges with a narrow binding or a turned hem to prevent fraying and reduce bulk. For curved brims, use bias binding folded neatly and sewn with short, even stitches of about 2 to 3 mm — the grain direction and stitch length make a small, but visible, difference to how the brim holds its form.
After shaping, makers place stitching where a hat needs it most. Pickstitching near the edge locks brim layers together, a row of topstitching around the brim spreads tension and helps preserve the intended roll, and small bartacks at the crown-brim junction prevent separation under repeated stress. The finished brim is then blocked and set by steaming it over a block and allowing it to cool, which fixes the curve. An underbrim facing of felt, leather, or a tightly woven fabric absorbs abrasion and keeps the roll tidy. Together these measures form a stable scaffold that resists stretching, conceals wear-prone edges, and concentrates strain at reinforced points so the hat retains its shape through repeated wear. The result is a piece shaped rather than assembled, its careful finishing evident on inspection.

7. Block and shape the crown to set its profile and fit
Select the correct blocking form and transfer the intended crown profile with precision. Stretch the felt or fabric evenly over the block, then apply controlled steam so the fibres relax and the material settles into the chosen profile as it cools and dries. Line the interior with a lightweight canvas or buckram underlining, and set a shaped stay at the junction of crown and brim to preserve structure. Finish the brim edge with a narrow petersham or cloth binding to maintain the silhouette without compromising breathability. Tailor stitching to the behaviour you require: radial tacking from the crown centre sustains vertical height, spiral or concentric quilting distributes tension and resists slumping, and short, evenly spaced catch-stitches along the sweatband line prevent puckering. Use temporary basting to test each pattern and judge its effect before committing.
After blocking, when fitting a wet-moulded leather or cotton sweatband, work on a head form and allow the band to dry slightly under gentle tension. Hand-stitch it in with staggered tacks so the sweatband follows the curve of the head, anchors the hat, and reduces the micro-movements that can distort the crown. Mark reference points inside the crown and along the brim, and test-fit a mock-up or lining before the final sewing. Note any adjustments to blocking depth, stitch spacing, and underlining; those records turn one-off tweaks into reproducible steps, which is particularly useful when tailoring variations of a single crown shape.

8. Apply binding, facing, and ribbon to form resilient edges
Cut the binding on the bias (a 45-degree angle to the fabric grain) for curved edges; the bias gives the tape the slight stretch needed to follow contours without puckering. Pin and stitch the binding, then understitch or topstitch it into place so the visible stitching sits neat, and the binding stays true to the curve. Sew full or partial facings into the garment interior, trim and grade the seam allowances, then understitch the facing to the seam allowance to prevent roll; this lets the facing take edge tension and transfer stress away from the raw cut. Together, these considered techniques produce a cleaner silhouette and improved long-term shape retention, benefits that become evident in the garment's drape and wear.
Insert a narrow ribbon or twill tape along shoulder seams, waistlines, or hat crowns to form a tension channel and, where appropriate, a discreet sweatband. Select natural fibres or moisture-wicking materials for comfort, stitch the tape into the seam allowance, and secure the ends with bar tacks at high-stress points. Finish raw edges with closed or open binding: mitre the corners, clip curves, and press seams flat before edge-stitching so a neatly bound edge prevents fraying, distributes load across the trim, and reduces bulk where multiple layers meet. After finishing, perform simple durability trials, such as laundering or a gentle soak followed by repeated stretch cycles. Inspect for distortion or seam slippage, and adjust stitch length, thread tension, or the choice of interfacing to optimise resilience and wearer comfort.

9. Add ventilation to improve breathability and moisture control
Cut staggered rows of small perforations into the lining panels, then reinforce each hole with a narrow row of stitching or a fabric binding so the edges do not fray. Perforations increase air exchange and speed drying compared with a solid lining, helping the interior stay drier while leaving the hat's external silhouette unchanged. Where ventilation matters, replace solid inner-crown or sweatband inserts with open-weave mesh or a thin spacer foam faced in fabric. Top-stitch these into the seam allowance to keep them secure and neatly out of sight. These small interventions preserve shape and structure, and repay a careful look.
When improving ventilation, place discreet vents at high-heat zones, such as stitched eyelets or small mesh-backed slits at the temples, crown apex, and nape. Reinforce the surrounding seams with bartacking or bias tape so the openings retain their shape. Stitch ladder-style patterns, channel quilting, or parallel welt seams into the lining to form narrow airflow tunnels, and keep stitch lines slightly raised so the channels resist collapse under wear. Finish vent edges with narrow binding, fit small internal stays beside larger openings to steady the aperture, and avoid cutting vents through critical load-bearing seams so the block and brim remain stable while breathability improves.

10. Maintain, reshape, and store hats to preserve their long-term shape
Store hats on shaped wooden hat trees or in hat boxes lined with acid-free tissue to preserve the crown and brim. Avoid hanging them on pegs or stacking hats under weight, which deforms crowns. When the shape softens, introduce a steady, gentle steam, mould the crown and brim on a wooden block or in the palm of your hand, then allow the hat to dry on-form so the shape sets. Rotate hats between wears, and let linings and sweatbands air fully to prevent trapped moisture and body oils from compressing the fibres.
For cleaning and minor repairs, wipe leather sweatbands with a slightly damp cloth and condition only sparingly with a neutral balm; excessive conditioning can soften stitching and alter shape. Spot-clean fabric bands with a mild soap and lukewarm water, blotting rather than rubbing to avoid distortion. Repair loose stitching promptly to prevent progressive deformation. For high-value or heirloom pieces, engage a professional milliner to reblock or re-edge brims rather than attempting structural work at home. Store hats in fitted boxes with cedar blocks or neutral desiccants to deter pests and stabilise humidity. Never expose hats to direct heat from radiators or hairdryers, which can shrink or warp materials; when reshaping, use controlled steam and gentle hand-shaping. Taken together, these precautions preserve structure and comfort and help a well-made hat remain a piece that improves with time.
Shape, comfort, and longevity begin with choices hidden from view, such as lining weight, sweatband fit, interlining, and stitch placement. Small, deliberate adjustments, for example testing interfacing on scraps, pad-stitching the canvas, or widening a sweatband, produce measurable improvements in recovery, breathability, and pressure distribution. Together these details determine how a hat holds its shape, sits on the head, and endures years of wear.
Refer to the section headings when choosing the appropriate material, stitch pattern, and finishing step for each issue, and perform simple wear and steam tests to verify the result. With routine airing, gentle reblocking, and prompt repairs, these techniques keep a hat performing and make maintenance a natural part of caring for it.