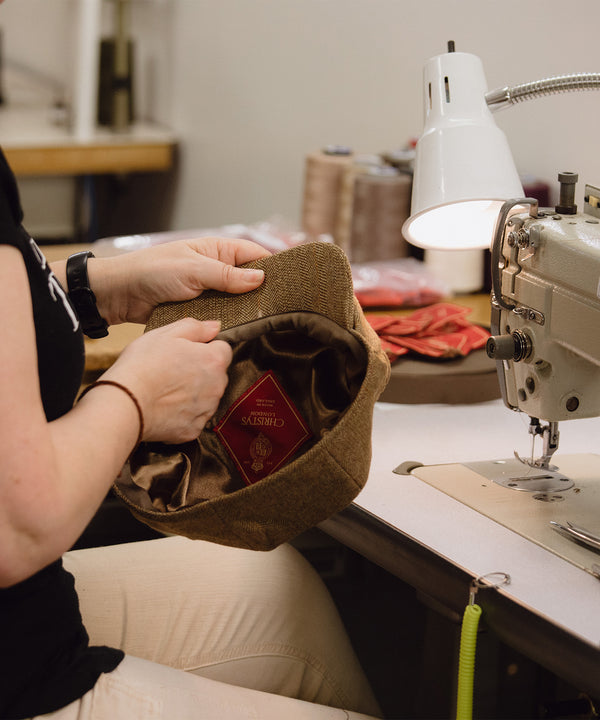
A cap's lifespan rests on more than fashion. Fibre, weave, and finish determine how it drapes, resists wear, and retains its shape. Whether made or bought, the right fabric separates caps that soften into character from those that collapse, stretch, or fray after only a few outings.
This guide examines the ten principal fibres, weaves, and finishes used for cap cloths, and explains how weight, weave structure, and engineered blends shape drape, resilience, and brim behaviour. Practical notes on interlinings, shrinkage, testing, ageing, and care will help you match cloth to purpose, set realistic expectations for lifespan, and choose construction details that suit intended use.

1. Prioritise fibre for drape, strength, and longevity
Match fibres to function, not fashion. Worsted wool gives a smooth, flowing drape and natural wrinkle recovery; merino offers a fine handle and good breathability; mohair and alpaca contribute tensile strength and a subtle sheen; filament silk lends lustre and an elegant fall; long-staple cotton and blended linens provide daytime structure. Inspect staple length and yarn construction, and note whether the cloth is worsted or woollen-spun. Long-staple and filament fibres, together with worsted spinning, reduce loose ends, lower pilling, and improve tensile strength and drape. Request swatches, examine edge fray and the cloth’s hand, and judge construction by touch to ensure the fibre choice suits the cap’s intended use.
Ask suppliers for objective test data and focus on three measures: Martindale or Wyzenbeek abrasion cycles, tensile strength values, and pilling ratings. Martindale and Wyzenbeek quantify abrasion resistance—higher cycle counts indicate greater resistance to wear; tensile figures give an indication of seam and yarn durability; pilling scores work the other way around, with lower ratings denoting better appearance retention. Complement laboratory results with simple in-person checks: rub a folded swatch to provoke pilling, stretch a seam area to assess recovery, and examine fold memory to anticipate how the fabric will behave over time. Consider smart blends that include small percentages of high-tenacity synthetics, such as nylon, to improve abrasion resistance and seam life without compromising hand or breathability, and avoid using high proportions of cashmere or other delicate fibres in high-stress panels. Specify finishes or processes—pre-washing, compact spinning, or mercerisation—where appropriate, and insist on wear and wash trials of prototypes so you can see how the chosen fibre and finish age in real conditions.
Pick merino tweed for durable, breathable everyday caps

2. Match natural fibres to performance and occasion
Match fibre to occasion. Worsted merino, with combed long fibres, produces a smooth drape, reliable crease recovery, and natural breathability, making it the considered choice for tailored city suits and travel. For informal, chilly wear, shorter-staple brushed wools and fulled flannels trap more air and soften with use. Tweeds and heavyweight woollen weaves, whose twill structure, higher yarn twist, and fulled finish help them resist wind, shed moisture, and stand up to abrasion, suit country jackets and outdoor pursuits. In warm weather, linen's high thermal conductivity and moisture wicking cool the body but creases readily, so opt for looser cuts or blended linens, and favour cotton twills and chino weaves for trousers that combine cooling, durability, and easier maintenance while travelling.
Consider silk and wool-silk blends where surface sheen and a fluid drape matter. Pure silk lends a refined softness suited to evening wear and linings, but a modest silk content in wool preserves resilience and improves the hand without compromising longevity. Avoid pure silk in high-abrasion areas, such as trouser knees or the insides of everyday jacket pockets, where it will wear more quickly. Match finishes to intended use and care: fulling increases density and windproofing, brushing or napping adds insulation, and mercerising strengthens cotton and raises surface lustre. Before committing to a cloth, read construction notes and labels, handle the cloth to assess its feel and stretch, and choose fibres and finishes that reflect how often you will wear, clean, and press the garment.
Pair refined merino tailoring with a structured felt hat.

3. Use engineered synthetics and blends to reinforce shape and stability
Specify high-tenacity engineered fibres for the structural core, such as polyamide or polyester filaments, or bi-component fibres, placed in the warp or weft where tensile strength and low elongation matter. Use core-spun yarns when a natural face is required over a synthetic backbone. Blend a worsted-wool or combed-cotton face with a synthetic core or filament backing to preserve drape, breathability, and visual appeal while improving durability, and manage pilling and seam slippage through deliberate yarn constructions and appropriate twist levels. Request laboratory abrasion and tensile data, for example Martindale results, and sample finished cloths to assess the hand, drape, and colourfastness to inform production decisions. These measurements are practical: they indicate how a piece will hold its shape and how the surface will wear with time.
Choose weave architectures that redistribute stress and resist abrasion. Twill and broken-twill patterns deflect scuffing, plain weaves provide dimensional stability, and ripstop inserts stop small tears from propagating. Place tighter weaves or denser structures in high-wear panels, and where reinforcement is required without sacrificing finish or drape consider double-cloth or bonded constructions. Use thermal setting to lock filament geometry and reduce residual shrinkage, and apply a light resin or polymer finish to improve abrasion resistance and seam durability while monitoring handle and breathability. Design reinforcement into the garment with panels, taped seams, bar-tacks, and gussets. Finally, run field trials and standard wear tests to measure fatigue, abrasion, and dimensional change, then iterate and document which constructions and blends extend service life most effectively.
Choose a blocked wool hat for lasting shape.

4. Use weave structure to shape drape, resilience, and appearance
Begin by choosing a weave family that suits the performance you require. Plain weaves give a stable, hard-wearing structure. Twills distribute stresses across the cloth, which improves drape and helps the fabric recover its shape. Satins use long floats to produce a smooth surface and subtle sheen, but they trade off abrasion resistance. Basket and hopsack weaves group yarns to increase breathability and overall resilience. Within that chosen structure, control the hand and durability through yarn geometry. Increasing yarn twist reduces pilling, filament yarns yield a smoother surface, and coarser singles and slub yarns add texture and visual depth. Specify the weave family early in development, then request woven samples in that family so you can assess drape and visible wear before placing an order for yardage.
Weave density and interlacement determine how a cloth balances durability with fluidity. Increasing the number of ends and picks per centimetre spreads load across more interlacements, reducing stress on individual yarns and improving abrasion life. Lower density, by contrast, lengthens floats and enhances drape. Float length and placement also influence appearance and snag risk: long floats reflect more light but catch more easily, so break them up by staggering weft placement or by mixing filament and spun yarns to retain lustre while reducing snagging. Request face and back weave maps from suppliers and specify target ends and picks per centimetre. Ask for samples that vary yarn count and twist in the warp and the weft, and compare them under rubbing and folding. Finally, agree the finishing sequence in advance and test the finished fabric for drape, recovery, and repeated-wear using simple flex and abrasion trials or a Martindale test, rather than judging performance from the greige cloth alone.
Choose tightly woven, brushed cotton for durable, refined headwear

5. Apply felting, brushing, and wax finishes to shape and protect
Felting, or controlled fulling, collapses the microscopic scales on wool fibres through agitation, moisture, and pressure. The result is a denser, abrasion-resistant cloth that will hold crown and brim. Because wool felts readily while cotton and linen do not, always trial the process on a scrap panel prior to making a full piece. While still damp, stretch the felted panel over a hat block or mould to set the form; blocking fixes the shape. Sequence matters: build the body by felting, lock the form by blocking, refine the surface by brushing, and apply wax only when the gain in water repellency justifies the attendant reduction in vapour permeability.
Brushing or raising the nap with a horsehair brush, a fibre brush, or a low-speed rotary carder lifts fibres along the pile and restores softness and insulation. This also increases surface fuzz and the risk of pilling, so balance the aggressiveness of the treatment with the hat's expected longevity. Wax and oil finishes work best when gently warmed and worked in sparingly, then buffed and set with mild heat or steam to improve beading and abrasion resistance. Tight weaves, open weaves, and synthetic fibres absorb wax very differently, so trial combinations on a swatch before treating the whole piece. Reproof waxed caps by spot application and buffing rather than repeated full rewaxing, and, where environmental profile and end-of-life considerations matter, favour gentle spot-cleaning, plant-based waxes, or technical treatments.
Choose a precisely blocked fur-felt hat for lasting polish

6. Balance weight, density, and hand when blocking to shape brim behaviour
Begin by weighing a square swatch and calculating grams per square metre to compare cloths objectively. Use the lightest cloth as a guide for a soft, flopping brim, select medium-weight for a controlled roll, and choose heavier weights when the brim must hold a crisp edge. Assess density under a loupe, counting threads per centimetre; a tighter weave, or constructions such as twill or gabardine, resists distortion and yields predictable blocking, whereas an open or basket weave will drape and fray more readily. Treat these ranges as starting hypotheses and confirm them with physical blocking tests on representative brims, since blocking reveals shrinkage and curvature that measurements alone cannot predict.
Assess the cloth's hand with repeatable tests. Pinch and release to judge memory, rub opposite faces to sense nap and friction, and mill a sample to observe how the cloth fulls; higher yarn twist and greater wool content generally increase spring and resilience. Apply finishes deliberately: sizing, light resin, or controlled fulling will stiffen the cloth and reduce fraying, whereas brushing or enzyme treatments will soften it, so always pre-block samples after finishing to allow the structure to settle. Document how steaming, tension, and cooling alter curvature and crown set. Prototype early by making a small cap panel and brim, and block them on the intended block size. Stitch reinforcing lines or add internal interfacings where needed, simulate wear by flexing, compressing, and humidifying, and record which combinations of weight, density, hand, and finish produce the desired brim roll and recovery so you can scale decisions predictably.
Choose a wool-linen cap for breathable, structured brims.

7. Allow for interlinings, shrinkage, and stretch in shaping and construction
Begin with controlled swatch trials. Launder, press and mechanically stretch small samples; measure dimensional change and drape, and record the results on a fabric data card. Setting seam allowances and ease from measured figures, rather than from guesswork, reduces the risk of distortion at final assembly. Match interlining type and placement to the cloth's behaviour. Use hair canvas — the woven horsehair-and-wool canvas that gives resilient structure — or pad-stitch where controlled body is required, and lighter fused interlinings where softness is wanted. Avoid full bonding on fabrics that relax with steam, because it can cause puckering and a distorted roll. Design allowances for stretch and recovery by adding targeted ease at stress points, applying stay-stitching across necklines and shoulder seams, cutting collars and cuffs on the correct grain, and specifying stitch length and thread tension that permit elastic recovery without skipped stitches. These considered steps keep seams neat and the roll of a collar or cuff true, outcomes that reward closer inspection.
Controlling movement in fabric and canvas depends on a deliberate sequence of construction steps. Begin by basting, then blind-tacking shaped canvases before their final attachment; grade and clip seams to reduce bulk; understitch linings to prevent bagging; and fuse or press interlinings with recorded temperature, pressure, and timing so the cloth is not over-set. Use full-size swatches where possible so the cumulative effects of each operation are apparent. Establish production controls that reflect real behaviour: pre-shrink full production lengths or specify batch pre-treatment, and require a first-article sample that completes the full wet and press cycles before sign-off. Keep a written record of fusing and pressing parameters, and feed swatch data into pattern and process specifications so allowances and workflows are based on measured results. Train machinists to recognise early signs of shrinkage, stretch, and differential distortion, and make those observations part of routine quality checkpoints.
Ensure a snug, non-distorting interior fit.

8. Test the fabric for abrasion resistance, tensile strength, seam integrity, and wear performance
Subject candidate cloths to controlled abrasion and tensile testing in both warp and weft, recording cycles to failure and the force-to-break. Photograph failure zones under a loupe or microscope to distinguish fibre fibrillation from yarn breakage. Assess seam integrity with cyclic flexing and seam-slippage protocols that reproduce movement at elbows, seat lines, and pocket openings. Measure seam elongation and stitch rupture points, and inspect thread wear separately, because thread abrasion often precedes fabric failure. Use these objective measurements to rank cloths against specific use-case requirements, noting where a fabric’s strength comes at the expense of hand or colour retention. Log all results in a reproducible format so metrics remain comparable across batches and suppliers.
Pair laboratory screening with practical wear trials. Issue samples to a small, varied wear panel, prescribe realistic activities, and ask participants to keep brief wear diaries with standardised photographs of high-stress areas so subjective reports can be correlated with laboratory data. Standardised images of seams, brims, and contact points make abrasion, seam slippage, and soiling measurable rather than anecdotal. Include accelerated ageing in the test programme. Subject cloth to repeated laundering, heat, UV, and sweat or salt exposure, measure colour change as Delta E, and reassess hand, strength, and finishes such as anti-pilling and water repellency before and after cycles to reveal durability trade-offs. Define clear, measurable acceptance criteria up front. Log every failure mode, perform root-cause analysis on the principal failures, then iterate on fibre, weave, finish, or seam construction so laboratory metrics map predictably to real-world longevity.
Reach for durable wool that withstands daily wear

9. Anticipate ageing, patina, colourfastness, and common wear patterns
One useful first step is to map high-friction zones, such as the brim edge, crown seams, and sweatband, and to identify their principal causes: handling, UV exposure, and perspiration. Design around those patterns with targeted mitigations, for example reinforced stitching at seams, a denser weave at the brim edge, and replaceable sweatbands to limit concentrated abrasion and staining. Expect fibres to age in different ways. Wool and leather typically develop a warm patina and a mellowing of colour because dyes penetrate the fibre structure. Many synthetic fibres resist UV fade yet reveal surface abrasion or pilling. Select fibre and dye combinations according to the finish you seek: even fading, preserved colour, or a patina that improves with time.
When choosing a material, run a few simple, practical tests. Start with a crocking rub: use a damp white cloth on a concealed area to check for colour transfer. Expose a small hidden swatch to strong light to judge potential fading, and, where available, request Martindale abrasion figures and ISO 105 lightfastness scores to quantify expected wear. Bear in mind the trade-offs of surface finishes and treatments. Water-repellent, stain-resistant, and anti-pilling coatings can improve short-term performance, but they may alter the hand, trap grime, and wear away at high-contact points. Specify finishes that strike a balance between breathability and protection, and plan for periodic reproofing so performance can be restored without erasing a desirable patina. Protect a cap’s life and character by rotating styles, storing pieces in a breathable bag away from direct sunlight, spot-cleaning perspiration with a mild detergent, reproofing when performance wanes, and repairing brim edges or re-stitching seams promptly so small defects do not become irreversible.
Choose Merino wool for everyday wear and natural patina.

10. Match fabric to its purpose, care for it, and set realistic lifespan expectations
Choose fibre, weave, and finish to suit the garment's role. For daily, high‑abrasion pieces, favour tightly spun worsted wool or densely woven cotton with a hard finish; higher yarn twist and closer interlacing resist surface wear and help the fabric hold its shape. For travel and variable weather, select an open weave treated to breathe and shed moisture; these fabrics recover with a light press and tolerate packing and changing conditions. For formal garments, opt for finely woven worsted or silk blends, which show crease lines cleanly and contribute to a considered silhouette.
To keep wool garments serviceable and allow them to improve with age, adopt straightforward routines. After each wear, brush with a soft clothes brush, and air items on a hanger to release surface dust and moisture. Treat stains promptly with a mild detergent and cold water, blotting rather than rubbing to avoid disturbing the nap. Use steam rather than a hot iron on delicate weaves to preserve finish and shape. Rotate similar garments so stress falls across different panels rather than the same elbow, collar, or seat area, which delays thinning. Inspect elbows, collars, and seats regularly for thinning, piling, or loss of nap, and reinforce high-stress seams or pocket corners before they fail. Where appropriate, choose subtle repairs, invisible reweaving, underlining, or partial relining, or ask a tailor to add interlining or replace facing panels to restore drape and strength. Avoid prolonged sunlight, remove salt and perspiration promptly, and dry wet items flat, away from direct heat. Store garments in a ventilated, dehumidified, breathable space, using cedar or silica to reduce fibre breakdown, mould, and insect damage.
Longevity begins with matching fibre, weave, and finish to a cap's intended purpose, then embedding those choices in construction, testing, and care. Prioritise long-staple or worsted fibres, or engineered blends, for their tensile strength; specify weave density and interlinings to control drape and brim behaviour; and reserve finishes until after sampling and performance testing. For example, a country tweed cap will usually need a denser weave and a firmer interlining to hold shape in wind and rain, while a summer straw or panama benefits from an open weave and a softer finish to breathe and drape. These are structural decisions as much as aesthetic ones, and they determine whether a cap will age gracefully and develop character.
Work through the guide's headings, from fibre and weave to finish, testing, and care. Use swatches, Martindale and Wyzenbeek results, and blocked prototypes to observe how materials age and perform. Those measured steps render a product's lifespan more predictable, lessen the need for mid-life repairs, and help preserve the patina and function you set out to achieve.