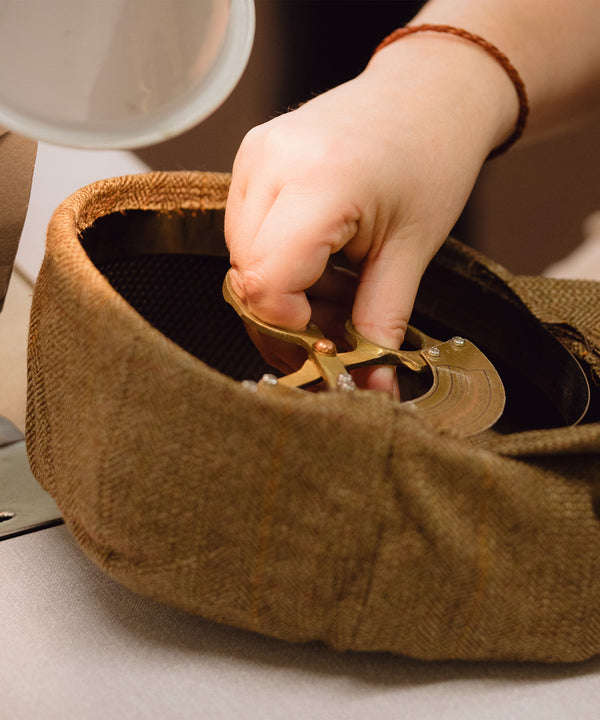
Examining a cap reveals whether it was hand-blocked or machine-made, and that distinction clarifies likely fit, longevity, and the subtle markers of skilled making. Hand-blocked pieces commonly bear small asymmetries, a moulded structure that accepts gentle reshaping, and finishing details set by hand that reward closer inspection; machine-made caps tend toward precise symmetry, repeated seams, and uniformly applied finishes.
Here are ten practical signs, from material preparation and crown shaping to brim finish, stitching, interior detailing, subtle tool marks, fit, and maker provenance, that reveal traditional hand-blocking. Read on to see what to look for and how each detail rewards closer inspection, allowing you to draw your own conclusion about a cap's craft.

1. How hand-blocking shapes a hat's form, finish, and fit
Hand-blocking, a traditional hand-shaped process, uses wooden blocks, steam, and controlled pressure to form the crown and brim. The method manages drape, tension, and the fabric's memory so the cap retains a soft, three-dimensional profile without heavy internal stiffeners. Observe how the fabric grain follows the contours rather than cutting across them, and feel for subtle, non-uniform curves, gentle feathering at stitch lines, and faint tool impressions. Run a fingertip along the brim and crown to sense smooth transitions and the fabric's responsive spring-back, then compare those cues with the mechanical uniformity of a machine-made cap.
Try the cap on. Makers tailor crown height, brim roll, and headpiece taper to different head shapes, so note how it sits across the forehead, temples, and nape, and whether the form returns after movement. Bear in mind that steam and pressure alter the nap, change local sheen, and relax weave tension; inspect the surface under oblique light for the direction of the nap and any local shifts in sheen where pressure has been applied. Look inside for construction choices that allow reworking, and for faint changes in nap or neat stitch repairs that point to past re-blocking. Finish with a brief compression test: a cap that promptly regains its shape is likelier to be serviceable and to endure.
Choose a low-profile Merino cap for refined, shape-retaining fit.

2. Assess material preparation and the quality of felting
Begin by following the nap, the direction in which the fibres lie. Gently stroke the crown and brim to feel directional alignment, subtle resistance, and smooth transitions. Hand-felted caps commonly retain a slightly uneven, directional nap from manual laying and wetting, while machine-made pieces feel uniformly brushed. Compare density and thickness across the shell by pressing the crown, the crown base, and the brim edge to map how the felt compresses and rebounds. Hand-blocking often leaves faint gradations where the maker thinned or densified particular areas, whereas machine felts compress more uniformly. Finally, tilt the cap under raking light to reveal variations in sheen, tiny smoothing marks, and minute felting-pod impressions that record manual handling, details that show up only when the light skims the surface.
Lift the sweatband and inspect the raw edge. A handcrafted piece will often show continuity of compacted fibre or hand tacking, stitched or pinned rather than concealed by a neat adhesive seam. Assess shape memory with gentle compression and warmth: press the crown, warm it in your hands, then release and observe how quickly the form recovers and how faithfully the contour is retained. Natural, hand-felted fibres tend to spring back with a softer, more elastic return than homogenised, machine-pressed felts; that behaviour indicates fibre treatment and the degree of maker intervention. Taken together, nap, density, joins, and recovery provide the tactile and visual cues that distinguish hands-on blocking and hand-finished construction from machine production.
Choose a hat showing hand-blocked shaping and leather sweatband.

3. Look for a gently shaped, consistently formed crown
Hold the cap at eye level under a raking light and rotate it, watching how the shadow flows; a truly hand-blocked crown shows a continuous, gentle curve with no repeating mould lines or abrupt seams. Run your fingertips from the crown apex toward the brim to feel subtle gradations in tension, thickness, and spring; hand-blocking often yields a taper you can detect by touch, whereas machine-formed crowns tend to feel uniformly rigid or uniformly soft. These visual and tactile checks reveal different shaping methods without needing specialist tools.
Inspect the interior where the crown meets the sweatband and seams. A hand-blocked cap will sit flush, with even stitch spacing, because the material was shaped to size rather than stretched or glued into place. Examine the fabric grain across the crown: fibres in a hand-shaped hat follow the curve, showing slight compression at the summit and gentle stretching toward the sides, evidence of wet shaping and careful hand finishing. Press the crown gently at several points, then release to observe how it recovers. A properly hand-blocked crown returns smoothly and preserves its shaped silhouette, rather than snapping back into a perfectly symmetrical moulded dome.
Choose a blocked crown for lasting shape under scrutiny.

4. Inspect the brim roll and edge finish for evenness and clean lines
Run a fingertip along the brim roll. A hand-rolled edge will feel soft, tapered, and subtly graduated; a machine-cut edge often feels uniformly stiff or glued. Hold the brim to raking light to reveal irregular stitch spacing, faint tacking marks, and the minute overlaps where the roll was secured, because these non-repeating details are physical evidence of hand work. Finally, compare the two sides for slight asymmetry in roll tension, edge taper, or stitch placement, since near-perfect mirror symmetry is more likely the result of automated production.
Examine the edge finishing: a rounded, burnished edge or a neatly concealed join suggests hand-finishing, whereas machine finishing often leaves a razor-sharp cut or a visible adhesive bead. Turn the cap over and inspect where the body meets the sweatband; minute pinpricks, asymmetrical hand tacks, or slight variations in stitch direction are the sorts of details a loupe will reveal. These small, inconsistent marks point to the milliner's hand rather than to any single decisive tell. Taken together with the tactile and visual clues from the brim and crown, they allow you to form a reasoned view on whether a cap has been hand-blocked or produced by machine.
Favor hand-finished caps for subtle, enduring quality.

5. Examine seams, stitching, and binding: even stitches, reinforced joins, tidy finishing
Begin with a jeweller's loupe, a small handheld magnifier, to examine stitch regularity and seam finishing. Machine stitching will look mathematically uniform; slight variations in stitch length or spacing usually indicate hand sewing guided by the block. Inspect raw-edge treatment: overlocked or serged loops at the seam allowance point to machine production, whereas neatly turned, bound, or blind-stitched edges indicate hand finishing and careful shaping after blocking. On the brim, look for pick-stitching or hand-rolled edges; small, slightly irregular entry holes set close to the edge reveal hand work rather than a perfectly even running stitch. Note these cues when distinguishing machine construction from hand finishing.
Lift the sweatband and examine the attachment points and reinforcement tacks. You will see individual tacking stitches, discreet knotted finishes, and tiny needle holes that correspond with hand-sewn reinforcement rather than a continuous machine seam. Hold the cap to angled light to reveal stitch holes and slight variations in thread tension; thicker natural or waxed threads with subtle tension differences are typical of hand work. By contrast, uniformly fine polyester thread and identical tension across seams generally indicate machine assembly. Note too any small, neat repairs that are barely visible at first glance, as these often point to prior hand finishing and merit a second look.
Choose traditionally made caps for authentic hand-finishing

6. Inspect the interior, sweatband, and lining for wear and finish
Gently lift the lining and inspect the stitching. A hand-blocked cap will usually show slight variations in stitch length, occasional short thread tails, and discreet knots where threads are secured, features that indicate hand construction. Turn your attention to the sweatband: vegetable-tanned leather or a substantial, unfused fabric that softens and palms to the wearer, attached with individual tacking stitches at intervals, indicates hand finishing. By contrast, perfectly uniform stitching, continuous glue lines, or a sealed, fused edge point to industrial assembly.
Turn the cap over and inspect for faint blocking marks, such as shallow pressure rings, a gentle central impression from the block, or slightly eased seams where the material met the form; these are signs the piece was shaped by hand. Run your fingers along the junctions where the sweatband, crown, and peak meet. A hand-blocked cap will show gentle, even easing, a little give under pressure, and small blind stitches. Rigid, identical joins or visible overlocking point to mechanised finishing. Also look for maker-level reinforcements: tiny pin-prick holes from hand-punching, short hidden backstitches at stress points, and neatly trimmed seam allowances. Hand-burnished sweatband edges and other asymmetrical, practical details do not shout craft, but they explain why a cap finished this way tends to wear in rather than wear out. Taken together, these features reveal the maker's hand.
Insert discreet foam pads for a closer, comfortable fit

7. Recognise subtle maker's tool marks and deliberate asymmetry
Use low-angle light and a magnifier to reveal minute tool marks: pin-prick tack points where the felt met the block, faint burnishing lines from hand-rubbed tools, and shallow grooves left by shaping irons. These traces most often appear at the crown peak, beneath the sweatband, and under the brim. Run a fingertip along the underside of the brim and the seam lines to feel for slight rasping, variable thickness, or residual tack points, which stand in clear contrast to the uniform smoothness of machine work. Deliberate, subtle asymmetry, such as a marginally lower front crown, a slightly tapered brim at the temple, or an off-centre pinch, typically indicates intentional shaping for fit and style rather than production error. They reveal themselves on close examination.
Inspect the stitch work inside the sweatband and at the tacking points, using low-angle or raking light to reveal uneven stitch length, occasional double stitches, or short thread tails. Look for maker signatures and numbering tucked beneath the sweatband: faint pricks, impressed initials, or small ink marks can act as a maker’s fingerprint and help distinguish original construction from later repairs or wear. Combine tactile checks with magnification, and carry out targeted inspections in several places on the cap to build a reliable picture of hand-blocking. Treat each subtle mark as a piece of evidence, and assess them together rather than relying on a single sign.
Choose a hand-finished hat with maker's interior marks.

8. Test the fit and observe how the hat drapes
Place the cap on and turn your head through a few deliberate movements. Observe whether the crown and brim return to a smooth, three-dimensional silhouette rather than settling into a uniform crease. Run your fingertips along the inner band, crown, and brim to judge tension and give; a hand-blocked piece will show graduated, responsive stretch and a reassuring spring, whereas a machine-made cap often feels uniformly rigid or overstretched. Tilt the cap at several angles to check how it balances and frames your eye line, because a properly blocked cap sits naturally without pulling to one side and the brim remains parallel to your sightline. Lift the brim and let the material fall back into place, watching for soft, graded folds that follow the contours rather than abrupt creases or sheet-like stiffness.
Lift the cap a short distance from the head and study its silhouette and interior joins. Look for slight asymmetry, faint tool marks, and carefully guided hand stitching; these are the physical signatures of blocking, the process of shaping a felt or fabric on a wooden block. Those tactile and visual cues, combined with the cap's behaviour in wear, distinguish hand shaping from machine manufacture. A hand-blocked cap will have a responsive spring, sit evenly, and show a gradual, balanced fall from crown to brim — each a piece of concrete evidence beyond a merely neat exterior finish.
Choose a handcrafted country cap for balanced, natural fit.

9. How to tell hand-finished detail from mass-produced uniformity
Use a loupe or a strong light to examine stitch length, stitch angle, and thread tension around the sweatband and internal seams. Subtle irregularities, such as slight variations in length or angle and small changes in tension, indicate individual hand-stitching rather than machine-perfect repetition. Handle the cap to assess crown and brim memory. Press the crown gently and run a fingertip along the brim edge, noting any slight give, tapered burnishing, or uneven compression lines that reveal individual blocking and hand finishing. Hold the cap in angled light to reveal faint hammer impressions, tool marks, and localised variations in nap or dye absorption arising from manual blocking and burnishing; these features become apparent on close scrutiny.
Inspect the lining by turning it back and examine the underside of the sweatband for blind or uneven stitching, hand-set rivets or tacks, and any handwritten notations or maker's marks that attest to human assembly. Ask practical provenance questions, request close-up images of blocking scars, and note which block and material were used, and the block size where possible. Rotate the cap to view seams from every side, and assess whether straightforward repairs would be feasible, since repairability often reflects how a piece was finished. Taken together, these simple, tangible checks provide evidence to help distinguish genuine hand-finishing from machine-made uniformity.
Opt for wool-linen—breathable, structured summer cap.

10. Prioritise longevity, repairability, and the maker's provenance
Lift the inner sweatband to discern whether the band is hand-stitched or glued. Visible tacks, hand stitching, or a pegged brim indicate the cap can be taken apart for replacement; continuous glue or sealed seams usually preclude future repair. Study the blocked profile and pinch the crown shoulder: slight unevenness, faint tool impressions, or a felt that compresses and recovers are signs the cap will re-form on a block without losing its character. Request process photographs, a maker's statement, or the name of a recommended repairer; documented provenance records how the piece was made and who can service it later.
Examine common wear points, such as the sweatband, brim edge, and crown seam, for visible stitch holes, replaceable leather bands, or discrete reinforcement panels that indicate the cap was made to be serviced. Check that materials follow conventional standards, such as felt, leather sweatbands, and linen linings, since standard components travel well between workshops and make repairs straightforward. Look into whether local blockers and hatters still practise traditional techniques; a healthy repair ecosystem and transferable skills mean a cap can be re-blocked, repaired, and kept in service by different hands. Taken together, accessible construction, a responsive felt, documented maker provenance, and clear repair channels provide concrete evidence that a cap was made to last. Inspect these features to assess longevity and ongoing serviceability.
A hand-blocked cap bears layered, inspectable evidence of its making. Look for directional changes in nap and sheen, faint tack marks and tool impressions, slight asymmetry, and variations in stitch and brim finishing. Those tactile and visual cues, together with interior finishing and ease of repair, record hands-on shaping. They show how the maker controlled felt, pressure, and finish to produce a cap that holds its shape while remaining serviceable. Viewed together, those cues indicate a piece shaped rather than assembled.
Use these points as a practical checklist: material preparation, crown shaping, brim finishing, seams and interior work, tool marks, fit, finishing, and provenance. Taken together, they indicate whether a piece will wear in gracefully, allow straightforward repair, and reveal the maker’s trace on close inspection.