Why does one cap retain a crisp crown while another collapses after only a few wears? Beneath the outer fabric, a considered assembly of buckram, canvas, linings, and seam treatments determines its shape, comfort, and longevity.
This article unpicks each internal component, from linings and sweatbands to buckram, stiffeners, and taped seams, showing how they work together. It includes practical guidance on finishing, discreet fitting, and routine care to help your cap retain its intended shape and comfort.

How a hat's internal construction preserves its form
Small, often hidden details determine how a cap wears. Internal stiffeners, such as buckram or lighter fusible interfacings, set the front profile and resistance to crushing; check their condition by feeling the crown beneath the sweatband. A firm, even resistance indicates sound interfacing, while a soft or sagging patch shows it should be replaced with a matched weight of buckram or canvas. Taped seams bind raw edges, spread tension across panel joins, and reduce water ingress and fraying, so lift the lining to confirm neat, continuous tape and re-tape by hand with suitable cotton or nylon seam tape where it has become loose or brittle. The number of panels, the width of seam allowances, and the stitch technique also influence silhouette and longevity; look for evenly spaced panels, reinforced topstitching, and wider seam allowances if the cap will see frequent wear or require reshaping.
Millinery wire, internal stays, and well-stitched brim facings regulate the peak's spring and roll. Gently flex the brim to judge its return and stability. If it does not spring back, replace corroded wire or re-secure the anchoring stitching. Leather, cotton, or synthetic sweatbands and breathable linings protect the hat's internal structure by wicking moisture and preventing fabric distortion. Where possible, remove and air linings, and replace saturated sweatbands to preserve shape. These layers interact. A softened interfacing, loose taped seams, and a damp sweatband will accelerate collapse, while attention to each element restores structural integrity. Use a simple routine to diagnose and prioritise repairs: lift the lining, feel the interfacing, flex the brim, and note any loose tape, wire, or failing sweatband. Begin with the most straightforward interventions — restitching, replacing corroded wire, re-taping seams, or renewing the sweatband — and reassess the hat's stability. Small, timely interventions prolong a hat's shape and keep the piece reliable under repeated wear. These are the details that reward closer inspection.

Choosing linings and sweatbands for lasting comfort and breathability
Linings may be cotton, wool, technical microfibres, or mesh, each striking a different balance between moisture absorption, airflow, and drying speed. Natural fibres absorb perspiration and allow airflow; microfibres wick moisture and dry quickly, helping the cap retain its shape when damp. The thickness and construction of the lining also influence insulation and the cap's profile: lighter, more open linings suit warm weather or active use, while denser linings give a crisper, more formal silhouette. Internal stiffeners such as buckram preserve the crown's shape irrespective of the lining, so you can favour comfort without surrendering form. Small choices, such as lining material and internal stiffeners, make a noticeable difference.
The width, depth, and material of a sweatband, whether terry, suede, or elastic-backed cloth, determine how a hat distributes pressure and handles moisture. Wider, softer bands spread load and reduce rubbing. Bands that sit flush against the forehead, whether stitched in or replaceable, limit movement and therefore irritation; replaceable bands make maintenance straightforward. Ventilation comes from mesh inserts, perforated crowns, and venting channels, all of which increase airflow. Taped seams tidy the interior and add water resistance, but they reduce ventilation. For wet conditions choose sealed, taped seams; for maximum breathability favour unsealed or meshed interiors. For care, look for removable liners or sweatbands and confirm washability before cleaning. Dry components flat to avoid shrinkage or distortion, and replace bands when they lose absorbency or elasticity. Antimicrobial finishes delay the return of odour but do not remove the need to dry and clean. A few simple checks quickly reveal performance: press a damp fingertip to the band to test absorbency, run a finger along seams to ensure they lie flat, and check that the band contacts the brow evenly without pinching. If the band pinches, a firmer, more conforming band will suit active use; if you expect prolonged, formal wear, a softer, wider band will be more comfortable.

Shape the crown with buckram, canvas, and stiffeners
Stiffened woven cotton buckram preserves the blocking lines of a cap, lending the crown a firm, board-like shape, while softer interlinings produce a more relaxed silhouette. Common internal stiffeners include woven buckram, laminated felt, horsehair canvas, and removable plastic inserts; each balances weight, breathability, and edge retention differently. To assess a crown, feel through the lining for a resilient resistance that returns after gentle pressure. If reinforcement is required, open the lining, cut a template from the panels, and trial a stiffer insert before stitching it in place.
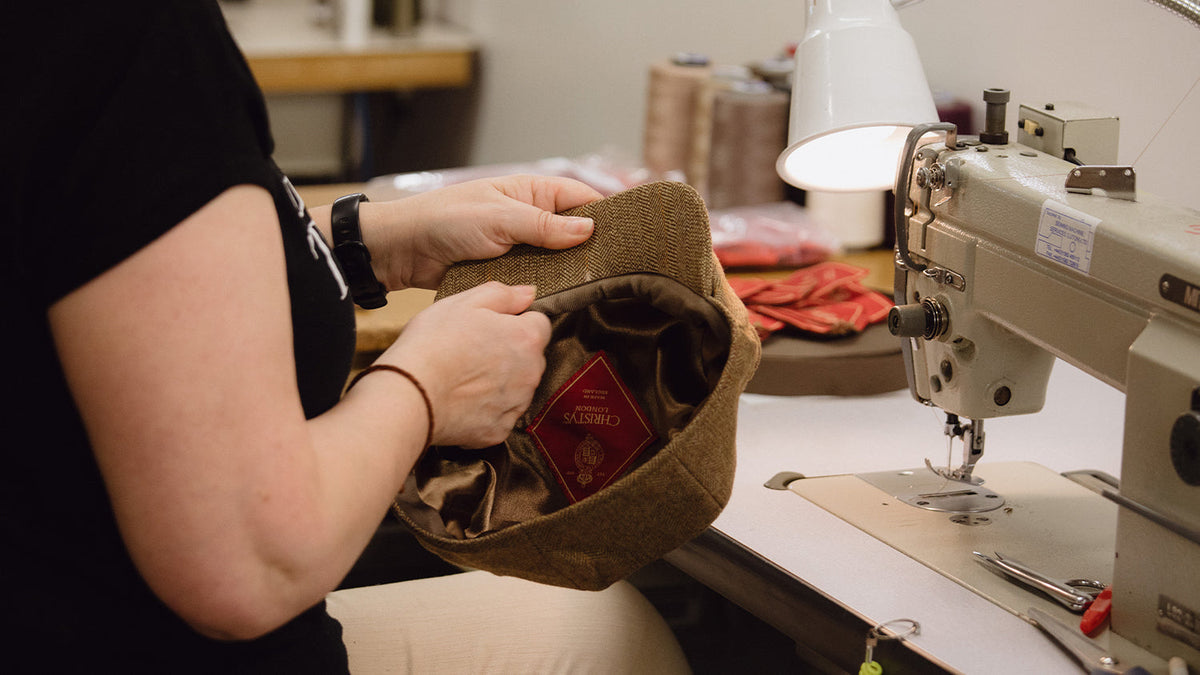
Taped seams join the panels, prevent fraying, and redistribute stress so the crown and peak retain their shape. Inspect the taped joins where the crown meets the visor for gaps or fray, and replace any damaged tape with close-weave cotton tape sewn with small, even stitches to restore structural integrity. A robust sweatband and a neat inner lining secure the cap to the head, absorb moisture, and keep internal stiffeners from shifting; replacing a softened band or inserting a thin foam pad between band and lining will often restore a head-hugging fit without altering the external silhouette. Finally, check stitch tension and the presence of back-stitched stress points at the crown and peak, and prefer stitched over glued stiffener edges, since glued inserts may delaminate in humid conditions.
Assessing and reinforcing a cap crown
- Inspection checklist: feel the crown centre and each panel seam for firm resistance that returns after gentle pressure, probe taped joins where the crown meets the visor for gaps or fray, check the lining for soft or hollow spots that indicate delamination, and inspect stitch tension and back-stitched stress points around the crown and peak.
- Practical repairs: open the lining when needed, cut a template from the panels and trial a stiffer insert before stitching it in place, replace damaged tape with close-weave cotton tape sewn with small, even stitches, restitch stiffener edges rather than glue them, and add a thin foam pad under or behind a softened sweatband to bring it back to a snug, conforming shape.
- Material trade-offs: choose woven buckram for a board-like shape and strong edge retention, laminated felt for moderate stiffness and a softer silhouette, horsehair canvas for breathable support and easy stitching, and removable plastic inserts for lightweight, adjustable reinforcement that reduces breathability.
- Maintenance and decision cues: favour stitched assemblies for repairability, avoid glued stiffeners in humid conditions where delamination is likely, trial any reinforcement in situ to confirm silhouette and comfort, and record internal changes beneath the lining to aid future servicing.

Finishing seams and bindings to preserve structure and ensure comfort
Inside a cap, a sequence of buckrams and stiffeners determines how the crown and brim hold their shape. A firm cotton buckram locks in a structured profile, while lighter horsehair or synthetic wefts introduce spring and resilience. Milliners layer and bond these elements to suit the weight and drape of the outer fabric, so the internal build will differ between a heavy wool cap and a fine linen one. Interlinings are secured by fusion, stitching, or heat-bonding. A close inspection will reveal the method used: a continuous glue line suggests fusion, neat rows of stitching indicate a sewn attachment, and a localized sheen and slight stiffness point to heat bonding. Finish seams and internal bindings then conceal raw edges and spread load; common choices include bias bindings, cotton twill tape, and folded seam bindings. A narrow topstitch or edge stitch of about 3 to 6 millimetres keeps the tape flat and reduces bulk, a small, considered detail that rewards closer inspection.
Taped or sealed internal seams, together with an appropriate lining and sweatband, limit water penetration and keep internal stiffeners drier. Drier stiffeners resist rot and loss of shape. Cotton or terry sweatbands wick and absorb moisture, and a taped centre seam in the crown helps reduce seepage along panel joins. High-wear zones gain longevity from targeted reinforcements: bartacks (short, dense stitches) at panel junctions, backing discs behind crown buttons, and reinforced brim cores with edge-binding. Distributing seam allowance and using a narrow stay stitch behind the binding reduces puckering and preserves a clean profile. For inspection and modest repairs, compress and release the crown to test its spring, and examine taped seams under a loupe or magnifier for fraying or adhesion gaps. Address faults by restitching loose bindings, overlaying a narrow twill tape over failing seams, replacing the sweatband, or gently steaming and hand-moulding a buckram-lined crown (buckram is a stiffening cotton). Take care not to overheat when working with steam. A trained eye will spot these features and catch early signs of wear.

Fit, adjust, and care with quiet attention to preserve a cap's shape
After attending to seams and bindings, consider the cap's internal anatomy: buckram or interlinings, taped seams, the sweatband, headband, and any crown stiffeners determine its silhouette and how it wears over time. Milliners use buckram to keep the crown rigid and stable; taped seams prevent seam fray and water ingress, while giving the interior crisp, uninterrupted lines. The choice of a leather or fine cotton sweatband, together with the discreet placement of crown stiffeners, distributes tension across the head and influences both comfort and longevity. Careful inspection reveals how each element contributes to fit and longevity.
Small, discreet adjustments can change the fit by about half a size without altering the exterior. Thin felt or adhesive size-reducer strips set inside the sweatband, narrow stitched pads at the rear, or re-seating an internal ribbon with tiny stitches all achieve this invisibly. For more substantial correction, removing and replacing the sweatband or re-taping loose seam tape restores fit and internal structure while remaining unseen from the outside. To reshape a crown, apply warm steam to relax the interlining, mould the crown over a rounded form, then allow it to cool and dry on that form so the profile sets. Clean the sweatband by blotting with a mild detergent and drying away from direct heat. Inspect internal tape for lifting and re-apply cotton twill seam tape with a warm iron, or consult a skilled tailor if you prefer a professional repair. Favour natural-fibre interlinings and leather or high-quality cotton sweatbands: they breathe, wick moisture, and slow distortion. Rotate hats and replace compressed bands before they begin to alter how the hat sits.
Taken together, a cap's silhouette is made, not merely worn: buckram, canvases, taped seams, sweatbands, and the stitchwork that binds them determine how the crown holds, how the brim springs, and how the piece ages. Simple tactile checks, such as lifting the lining, flexing the brim, and feeling for softened interlinings, reveal whether shape loss stems from softened stiffeners, failing seam tape, or a saturated sweatband, and indicate targeted repairs that restore form.
Finally, a cap's comfort and performance begin with its linings and sweatbands, which determine breathability and how the piece sits on the head. Match buckram and internal stiffeners to the profile you want, and ensure seams and bindings are finished to protect the structure. With a simple routine of inspection, discreet adjustments, and careful cleaning or re-taping, you preserve the intended silhouette and extend a cap's useful life. Lift the lining and begin with the simplest checks, for example dampness, loose stitching, or softened buckram.
FAQ
What commonly causes a cap to lose its shape?
Softened interlinings such as beaten buckram, loose or lifting seam tape, a saturated or compressed sweatband, corroded brim wire, or delaminated stiffener layers all allow the crown and peak to collapse or lose spring.
How can I inspect a cap to find the source of shape loss?
Lift the lining and feel the crown under the sweatband for firm resistance, flex the brim to test spring and return, run a finger along taped seams for gaps or fray, and check stitch tension and back-stitched stress points around the crown and peak.
What linings and sweatbands keep a cap comfortable while preserving form?
Natural fibres like cotton or leather sweatbands breathe and absorb moisture, while technical microfibres wick and dry quickly; choose removable, well‑fitting bands and lighter, open linings for ventilation, or denser linings for a crisper silhouette.
How should I repair or reinforce a softened crown?
Open the lining, trial a matched-weight insert cut from the panel template, stitch in a stiffer buckram or canvas rather than glue, and replace damaged seam tape with close‑weave cotton tape sewn with small, even stitches for durable reinforcement.
Can I reshape a cap at home without damaging it?
Yes, by applying gentle steam to relax the interlining, moulding the crown over a rounded form, and letting it cool and dry on that form, while avoiding overheating and taking care with glued stiffeners or delicate taped seams; consult a tailor for extensive repairs.