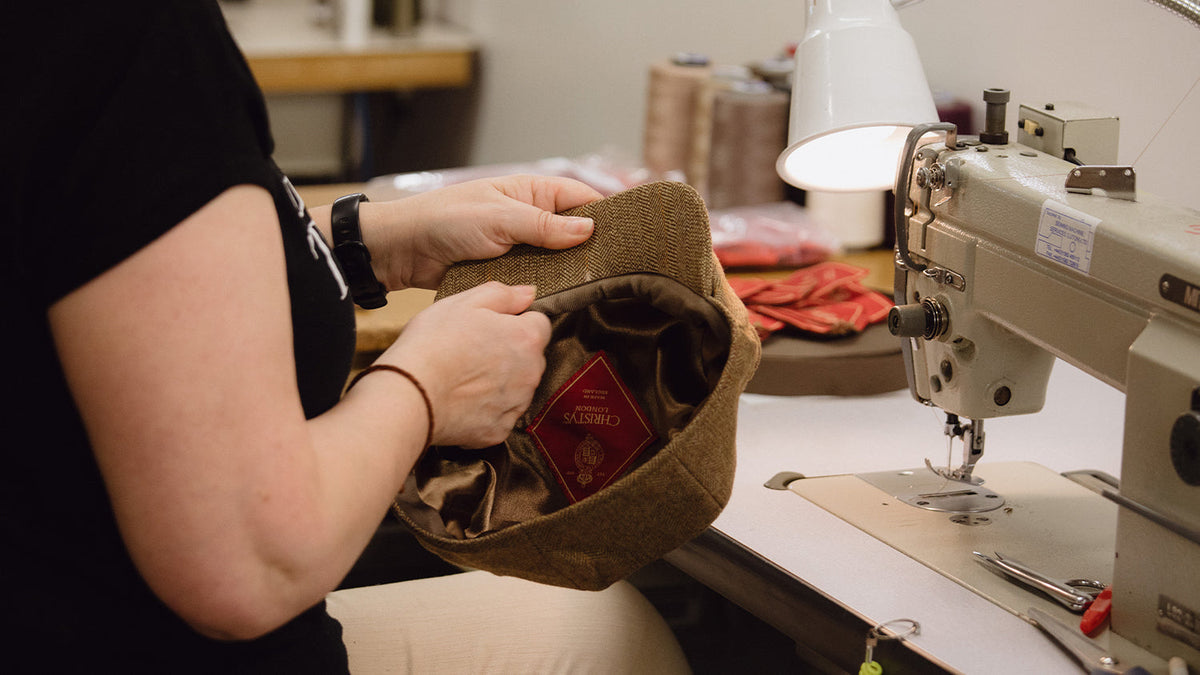
Few faults reveal inferior cloth so quickly as a crushed crown or a brim that will not sit true. How might you determine, before committing to a batch, which cap cloth will retain its shape through blocking, handling, and exposure to the weather?
This guide sets out considered, practical checks: examine fibre, weave, and weight; assess the finish with both eye and hand; and carry out simple block, flex, abrasion, and moisture trials to observe how cloth performs in use. Translate those findings into clear, measurable specifications for crown resilience and brim memory, so you can select cloth that holds its shape and wears well over time.

How to assess fibre, weave, and weight for hats
Begin by examining the fibre and surface under magnification. Long-staple fibres and a scaly, raised wool surface indicate superior interlocking during felting, while a smooth, glassy sheen often signals synthetic content. Gently pull a loose thread and watch how the fibres break and fray, which indicates how the cloth will lock around a hat's crown. These simple tests provide an early indication of whether the material will sustain a lasting crown shape.
Hold a swatch up to the light and bend the brim edge, then release. Minimal light transmission and a brisk spring-back indicate a tight, resilient structure that will support a sharp brim. Drape the sample over a wooden block or your hand to compare weight and line retention, noting whether the brim holds straight or collapses, since this predicts how firmly it will need to be blocked. Give the cloth a brief steam, shape it on a block, then cool and repeat; any cumulative stretch or permanent distortion reveals weakness in the fibre bonding. Finally, simulate wear by rubbing the surface, applying a little water, and shaking the sample, and watch for pile compression, weave loosening, or pilling, because real-world resilience determines how well a crown and brim will endure use.

Inspect visually and by hand for flaws and finish quality
Inspect the cap in good, diffuse light. Begin with a visual check, tilting the hat so uneven weave, streaks of dye, the direction of the nap, sheen, or shadow reveal any finish inconsistencies or weak spots. Next, assess resilience with a simple memory test: pinch the crown, bend the brim, then release, and note how quickly the shape recovers and whether any permanent creasing appears. Finally, trace the edges and seams with your fingertips to detect lumps, delamination, loose threads, or puckering that indicate tension or construction faults. These are the details that reward closer inspection.
Test surface treatments and colour fastness on a discreet patch. Rub the area with a clean, white cloth, then place a few drops of water and note any transfer, beading, or rapid darkening. Beading indicates a repellent finish; quick absorption or staining shows the fibre or finish will change with wear. Where possible, turn back the lining and inspect the seam allowances to identify interfacing, backing, or felt density rather than relying solely on the exterior. Press any exposed felt or backing to assess uniformity, since a dense, even backing will hold a mould and brim shape more reliably than patchy or thin support.

Block and flex the fabric to assess its shape retention
Secure the cap on a hat block or a household substitute, such as a jar or a rolled towel. Apply gentle steam or a warm, damp cloth and mould the crown and brim to the desired profile, then allow the hat to cool and dry on the form before removing it so the initial shape can set. Mark a fixed reference point and measure crown height and brim drop with a ruler or tape; repeat these measurements after each test to calculate percentage recovery and to track any progressive loss of shape. Photograph the cap before and after blocking to record visual change alongside the numeric data.
To assess a brim or cap for durability, combine a few simple mechanical and environmental tests that reveal permanent creasing, fibre fatigue, and changes to the surface. Begin with a controlled flex test: bend the brim down and back several times, compress the crown with a measured pinch, and repeat this cycle around ten times while noting any permanent crease or loss of spring. At each stage, inspect the fibres and seams for surface cracking, fuzzing, or broken yarns at the brim edge and crown seams, and feel for a gritty or papery stiffness that indicates fibre fatigue rather than elastic recovery. Follow with an environmental check. Expose the hat to a moist atmosphere or to cool conditions, then repeat the blocking and flex tests. Blocking here means re‑shaping the piece on a form or block; the point is to see whether humidity or cold alters malleability, causes bloom (a raised nap or fuzzy surface), or accelerates permanent deformation. Combine the visual, tactile, and quantitative observations to form a rounded prediction of likely real‑world performance and to inform choices about materials and construction.
Blocking and flex testing: checklist, failure cues, and practical fixes
- Standardised testing checklist: fix the cap to a hat block or household substitute, mark a reference point, photograph the starting profile, measure crown height and brim drop with a ruler or tape, apply gentle steam or a warm damp cloth and mould to the target profile, allow to cool and dry on the form, perform ten repeatable brim and crown flex cycles, re-measure and re-photograph, then repeat under dry, humid, and cool conditions; calculate recovery as recovery (%) = (post-test measurement ÷ initial measurement) × 100 and log visual, tactile, and dimensional data for each condition.
- Common failure modes and inspection cues: permanent creases indicate plastic deformation or insufficient resilience; reduced rebound or a lower recovery percentage signals elastic fatigue; uneven brim curl or asymmetric drop points to inconsistent stiffening or attachment tension; seam gaps, broken yarns, surface cracking, fuzzing, or a gritty, papery stiffness indicate fibre fatigue or finish breakdown; bloom in humid tests shows fibre swelling or failure of surface treatments; pair tactile notes with measured changes to identify severity and likely root cause.
- Design and material mitigation suggestions: add concealed brim reinforcements such as shaped buckram, sprung interfacings, or hidden wire, and use fused or sewn interfacings to spread load; select fibre blends and yarn constructions with proven resilience, apply moisture‑resistant finishes or heat‑setting where appropriate, and pre-shrink or heat‑set components to lock geometry; increase seam allowance and reinforce high‑stress points with targeted stitching, and define pass/fail tolerances from your measured recovery data to guide acceptable construction and material choices.

Simulating abrasion, moisture, and extended wear for hat testing
A controlled abrasion protocol can be executed in three complementary stages to permit direct comparison between constructions. 1. Abrasion testing: Mount a representative cap cloth on a fixed block and apply a standard abrasive surface or crocking cloth under repeatable pressure. Run a set number of cycles, and photograph the specimen with a scale after defined intervals to record pile loss, fibre fuzzing, and any change in crown height or brim curvature. Plot deterioration against cycle count so different constructions can be compared quantitatively. 2. Moisture and salt exposure: Simulate perspiration by applying a saline solution, then alternate humid and dry phases or repeat wetting followed by air drying. At defined points, measure dimensional change, water uptake expressed as a percentage of weight, adhesive softening, lining separation, and final brim curl. These measurements reveal how moisture and salts affect both the fibres and the assembly. 3. Handling and form retention: Fit specimens to a head form or mannequin and automate donning, doffing, and head motion, or use a flexing jig with marked reference points. After set numbers of cycles, measure displacement or sag to quantify shape retention. Carried out together, these procedures show how mechanical wear, moisture, and handling interact to influence durability and fit, and they provide the data needed to compare constructions on the detail that rewards closer inspection.
Focus durability checks for edges, stitching, and bindings on the brim edges, seam lines, and sweatband interfaces. Inspect under magnification for thread fraying, seam slippage, and binding delamination, and record the number of cycles to visible failure. Combine a visual grading system with simple tensile or peel tests where seams or adhesives are critical. Add heat or steam recovery tests to establish whether any loss of shape is permanent or reversible. Define pass criteria before testing — for example, a maximum allowable millimetres of crown sag, an acceptable change in curvature, or a percentage weight gain from moisture — and apply those thresholds consistently across samples. Use consistent photography, keep results in a straightforward spreadsheet, and test replicated specimens to assess variability so comparisons between fabrics and assemblies remain robust.

How to translate test results into precise fabric specifications
Begin by defining measurable performance metrics that a mill can test and report. These metrics should be directly tied to how the cloth will behave in hatmaking. Essential metrics include fabric mass in grams per square metre, thickness, weave density, yarn count, flexural rigidity, crease recovery after a specified number of flex cycles, dimensional change on wetting or steaming, and colour fastness on a 1 to 5 grey scale. Heavier cloth generally yields firmer brims, while higher crease recovery correlates with crown memory. State target bands where practical so laboratory results map unambiguously to acceptance criteria. Suggested target bands and test methods (examples) - Fabric mass (gsm): nominal 420 gsm, tolerance ±5 percent. Measure according to ISO 3801 or equivalent, condition samples at 20 degrees C and 65 percent relative humidity prior to weighing. Use the same nominal gsm and tolerance specification for brim-weight cloth unless otherwise noted. - Thickness: nominal 1.2 millimetres, tolerance ±0.1 millimetre. Measure under specified pressure according to ISO 5084 or equivalent. Report mean of five measurements taken across the sample. - Weave density: express as ends per centimetre and picks per centimetre, measured under 10x magnification across a 10 millimetre window. Specify target counts, for example 28 ends/cm, 18 picks/cm, tolerance ±2 ends or picks. - Yarn count: state count in tex or Nm, with test method ISO 2060 or equivalent. For example, warp yarn 30 tex ±2 tex, weft yarn 28 tex ±2 tex. - Flexural rigidity: state a target for both warp and weft, measured by ASTM D1388 (cantilever test) or equivalent. Express results in millinewton metres or bending length, and give acceptance band, for example warp 8 to 12 mN·m, weft 6 to 10 mN·m. - Crease recovery after flex cycles: specify the number of flex cycles and the recovery criterion. For example, perform 200 flex cycles on a standard flexing apparatus, then measure recovery angle according to ISO 2313; require a minimum recovery angle of 120 degrees, or specify a minimum score where the standard provides one. - Dimensional change on wetting or steaming: express maximum allowable shrinkage or growth as a percentage. For example, maximum linear dimensional change 2 percent after a steam cycle defined as 100 degrees C saturated steam for 5 minutes, measured per ISO 5077 or agreed laboratory method. Report warp and weft change separately. - Colour fastness: specify separate tests and minimums. For example, rubbing (dry and wet) to ISO 105-X12 minimum 3 on the grey scale, and light fastness to ISO 105-B02 minimum 3. State test conditions explicitly. Mill-ready specification sheet (each line phrased as a testable requirement) 1. Product identification: style name, intended use (for example brim-weight hat cloth), batch or order number. 2. Fibre composition: state exact fibre mix by percentage by weight, tolerance, and test method. Example: 80 percent rabbit fur felt, 20 percent wool; tolerance ±2 percent; verify by ISO 1833 or equivalent fibre analysis. 3. Nominal mass: 420 gsm, tolerance ±5 percent, measured per ISO 3801. 4. Measured thickness: 1.2 millimetres mean, tolerance ±0.1 millimetre, measured per ISO 5084, five-point mean reported. 5. Weave type and density: plain twill, 28 ends/cm and 18 picks/cm, tolerance ±2 ends/picks, measured under 10x magnification over a 10 millimetre window. 6. Yarn count: warp 30 tex ±2 tex, weft 28 tex ±2 tex, measured per ISO 2060. 7. Required finishing and stabilisation: describe the finishing process and state measurable outcomes. Example: steam-stabilised to achieve maximum linear dimensional change ≤2 percent after the specified steam cycle; surface finish add-on 4.5 percent ±0.5 percent by weight measured gravimetrically; nap raise within 1.5 to 2.0 millimetres measured with a standard nap gauge. 8. Target flexural rigidity: warp 8 to 12 mN·m, weft 6 to 10 mN·m, measured via ASTM D1388; report mean and standard deviation for both directions. 9. Crease recovery: perform 200 flex cycles on the nominated flex apparatus, then measure recovery angle per ISO 2313. Require minimum recovery angle 120 degrees, or equivalent score as agreed. 10. Dimensional change (wet/steam): maximum linear change 2 percent per ISO 5077 after steam cycle defined above; report warp and weft separately. 11. Colour fastness: rubbing dry and wet minimum 3 on ISO 105-X12; light fastness minimum 3 on ISO 105-B02. Report method, sample lot, and date. 12. Inspection and acceptance: measurement and visual inspection sampling to ISO 2859-1, AQL 2.5 for critical defects. Define acceptance criteria for measurement tolerances and appearance defects, and specify that failing lots will be reworked and retested. 13. Packing and labelling: deliver on rolls of nominal 20 metres, core diameter 76 millimetres, protected by acid-free interleaving paper, labelled with product identification, nominal gsm, lot number, and finishing date. Maintain humidity-controlled packaging where specified. 14. Sampling and reporting: supply three representative test specimens per roll; test reports must include test method, conditioning parameters, raw data, means, and deviations. Condition all samples at 20 degrees C and 65 percent relative humidity for 24 hours prior to testing. Phrase each line item as a measurable requirement so the mill can perform or commission the test without subjective interpretation. Where a test method offers variants, cite the specific standard to be used, or agree a laboratory method in writing before production begins. The result is a specification that rewards inspection and leaves little to conjecture, while making clear which properties influence brim weight, crown memory, and long-term behaviour.
Next, begin with unambiguous pass and fail criteria for every measurable attribute. For each metric, record absolute limits and allowable variation, for example thickness tolerance plus or minus 5 per cent, or a maximum shrinkage of 2 per cent that triggers rejection. Make those rules the baseline for all testing and inspection decisions. Set a sampling plan that specifies how many pieces to test per production run and the acceptable quality level for each metric. State the sample size, the inspection frequency, and the statistical threshold used to judge a lot. Where practicable, include a small illustrative table showing sample size versus acceptable quality level so readers can see the relationship at a glance. Define standardised conditioning and a named test method or controlled procedure for each measurement. Specify instrument settings, specimen dimensions, number of cycles, and any environmental conditions. Require photographic records at defined stages so results remain verifiable over time. Demand a uniform report layout. Each report should show raw data, calculated averages, standard deviation, and a clear pass or fail for every item tested. Use consistent units and decimal places so figures remain comparable between runs. Link laboratory metrics to simple on-head trials and quantifiable handling checks. Measure shape change in millimetres or degrees after simulated wear, and record tactile checks such as stiffness or recovery time in defined units or time intervals. Correlate those field results back to the lab numbers so the specification reflects real use. Treat the specification as iterative. Where evidence shows room for improvement, alter one variable at a time, for example increase finishing stiffness, change backing, or adjust yarn count, and repeat the test sequence. Record each change and its effect so the development path is traceable and decisions rest on measured improvement rather than intuition. This approach gives you a reproducible, auditable system: clear pass or fail limits, a defined sampling plan, controlled procedures and settings, photographic evidence, standardised reporting, practical on-head correlation, and a disciplined route to specification refinement.
In short, repeatable tests of fibre, finish, and structural behaviour under steam, flex, and moisture determine whether a material will hold a crisp crown and a true brim. Measuring recovery after blocking, the number of cycles to visible wear, and dimensional change when wet converts subjective judgement into mill-ready specifications.
To put this into practice, a measured testing sequence translates craft judgement into reliable specification. Begin by evaluating fibre and weave, then inspect the finish with both sight and touch. Block and flex sample swatches to observe shape memory and resilience, and subject them to controlled abrasion and moisture to reveal longer-term behaviour. Subtle characteristics, apparent only on careful examination, are often more reliably quantified than assumed, so record each change and convert observations into measurable metrics. Define pass, fail, and conditional acceptance criteria, sampling plans, and tolerances for shrinkage, flexural rigidity, and crease recovery. With these parameters in place, you can commission cloth that retains its shape through handling and weather, and make decisions grounded in data rather than guesswork.